


✔Reading time: 4min✔
HOW TO BOARD A LOFT FOR STORAGE*
If you are short of storage space in your home adding loft boards and using it for effective storage can be a great solution. Moreover, boarding the loft is a way to reduce heat loss, as it creates another barrier to any heat escaping from the roof.
In this article we are going to show you how to create extra storage space in your loft.
LOFT BOARD SIZES
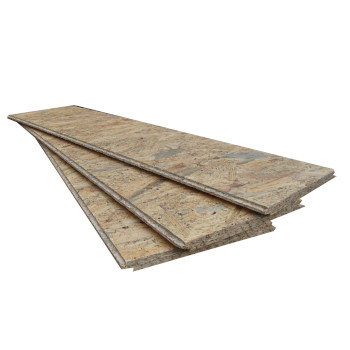
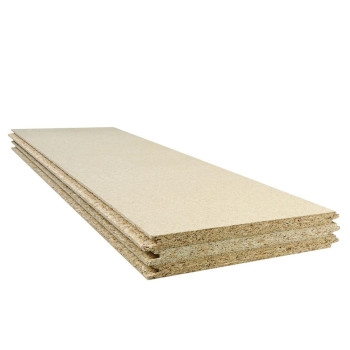
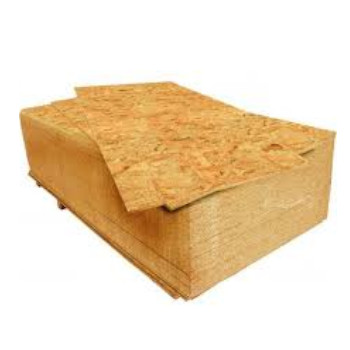
To board a loft space you can use OSB board, moisture-resistant chipboard or general-purpose hardwood plywood. While OSB board and plywood are the most durable materials, they are not commonly used to board loft space. The reason why is because attic hatch dimensions require it to be cut into smaller pieces. On the other hand chipboard may not be as strong as OSB or plywood but is more commonly used in UK due to their smaller size and price.
Chipboard loft boards generally have a tongue and groove construction which allows them to neatly slot together. Standard loft boards come in 3 different sizes:
2400mm x 600mm, 1220mm x 320mm, 2400mm x 1200mm; 18mm or 22mm thick. The larger boards such as 2400mm x 1200mm are available from your local timber merchant such as Wickes or B&Q.
1200mm x 320mm (packs of three and cover 1.17m² per pack) - easy to get through small loft hatches.
2400mm x 600mm (sold separately and cover 1.44m² each) - requires a large loft hatch and sufficient headroom to get into the loft space.
2400mm x 1200mm (big size board covers 2.88m²) - used less common due to large size.
TIP
Remember to make sure that the boards you decide on will actually fit through your loft hatch!
HOW MANY LOFT BOARDS WILL I NEED?
To find out how many loft boards you will need simply measure up the area you intend to board out. You need to multiply the width of your loft by its length.
A x B= m2
Loft m2 / board coverage m2 = boards no

Picture credit:loftboardingmidlands.co.uk
HOW MUCH DOES IT COST TO BOARD A LOFT?
If you are about to board your loft, you’re probably looking for the price. Adding a loft board you also adding value to your property - that is a fact. If you look from this point of view it won’t cost you much.
If you still want to find out how much it will cost you, here is a simple guide. The costs given here are given in good faith as an indicative guide only and should be used with understanding. Insulationgo Limited cannot accept any liability for any budget produced using these figures.
The overall loft boarding cost will depend on a number of factors such as different specifications of floorboards, loft area and whether you’re going to board the whole loft space or just a section of the loft for storage purposes.
However you should be expected to pay for a medium loft size (15m2) around £1300. If you are boarding a small loft, £800 should be enough to cover material costs only. Changing size scale, to board a large loft (20m2) costs start from around £1400 to £1800.
The cheapest way to board a loft would be off course to use a chipboard. You can expect to pay £66 per m2 on an average size loft. However, this figure decreases as the m2 increases.
When planning to board your loft, make smart shopping lists and find out which stores near you are cheapest to get your materials. If you are looking to buy insulation you can try our products here.
HOW TO START BOARDING LOFT
Before you start make sure you insulate your loft with acoustic slabs such as Rockwool RWA45, RW3 or RW5 or insulation roll. These slabs are non-combustible, with a class ‘O’ fire rating and can be friction fit. Acoustic slabs such as Knauf RS range or Rockwool RW range are manufactured to a higher density than other forms of insulation, unlike thermal insulation which is lower in density and supplied in rolls. For more information click here.
Make sure you have all the tools and material for this type of project such as:
gloves ǀ insulation mask ǀ knee pads ǀ handsaw ǀ trimming knife ǀ cordless drill ǀ screws ǀ tape measure ǀ pencil ǀ loft panels ǀ loft legs
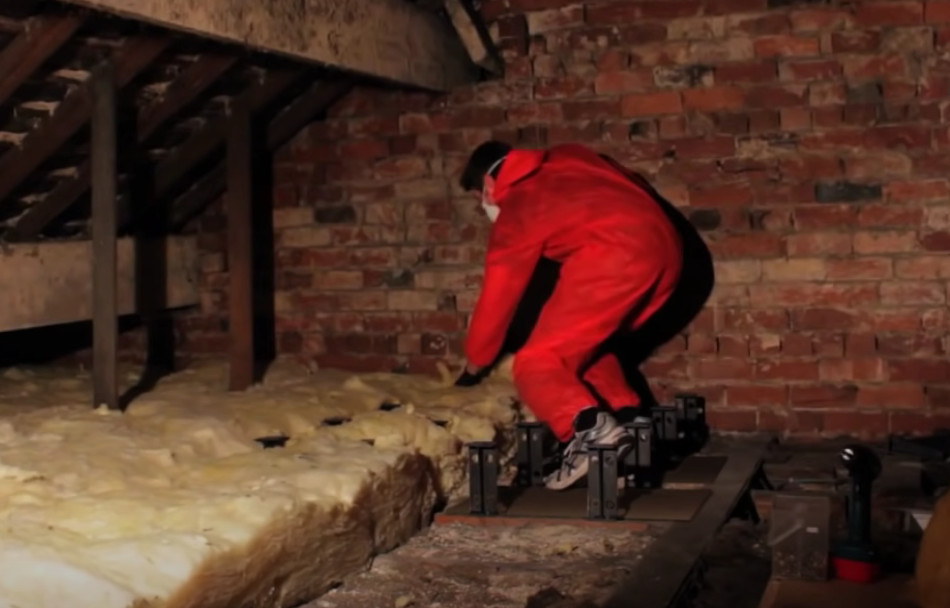
1. SAFETY FIRST!
Clear a space in the loft and remember not to stand in the area between the joists as it won’t support your weight.
2. INSULATION
Usually when loft boards are installed, insulation is often installed at the same time. Recent research suggests that only 1 in 8 of UK homes get the full benefit of their loft insulation, so when you’re undertaking the project it’s worth giving your insulation some careful attention. If you want to find out what is the best loft roll insulation click here.
If there is a top layer of insulation already installed, roll it back to expose the ceiling joists.
Before you screw the storage boards onto the legs you will need to replace the layer of insulation. To be thermally effective, mineral wool insulation needs to be at the government recommended depth of 270mm. This means you need to use 175mm loft legs for extra insulation to raise the boards (100mm first layer of insulation + 170mm second layer of insulation + 5mm air gap between top layer of insulation and loft board).
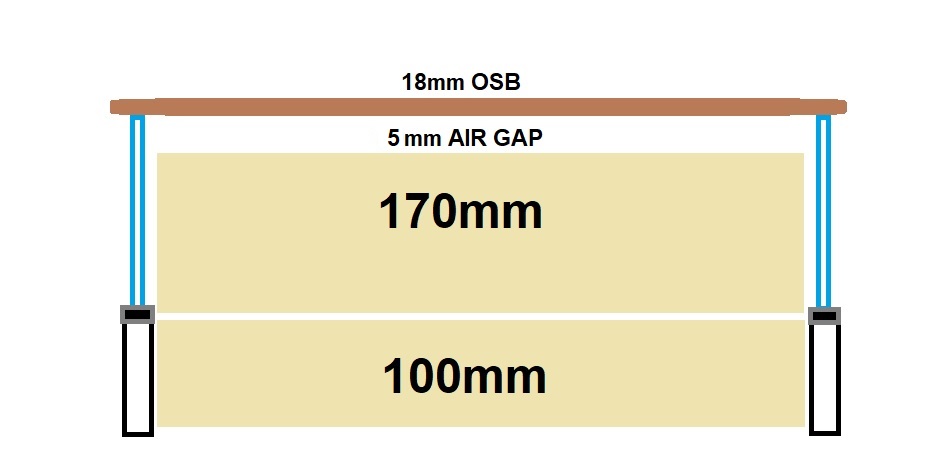
Loft board diagram
This is generally 100mm between the joists/trusses, and a 170mm top up layer running perpendicular to the joists.
3. LOFT LEG INSTALLATION
 Loft legs are screwed directly into the joists or trusses in a grid to raise the boards. These legs allow you to put down additional insulation across the joists and then install boards on top.
The main problem with the loft leg system is that if your ceiling joists are not level it simply does not work and you need spacers to make the boards level. Some people say that counter battening with timber is much more stable.
The loft boards should always be installed perpendicular to the joists. Place the first leg into position and using your power drill driver, screw it into the joist. You don’t need to pre-drill holes.
Using a straight edge such as spirit level and the bottom edge of the loft leg as a guide, mark the position of the next legs on the other joists.
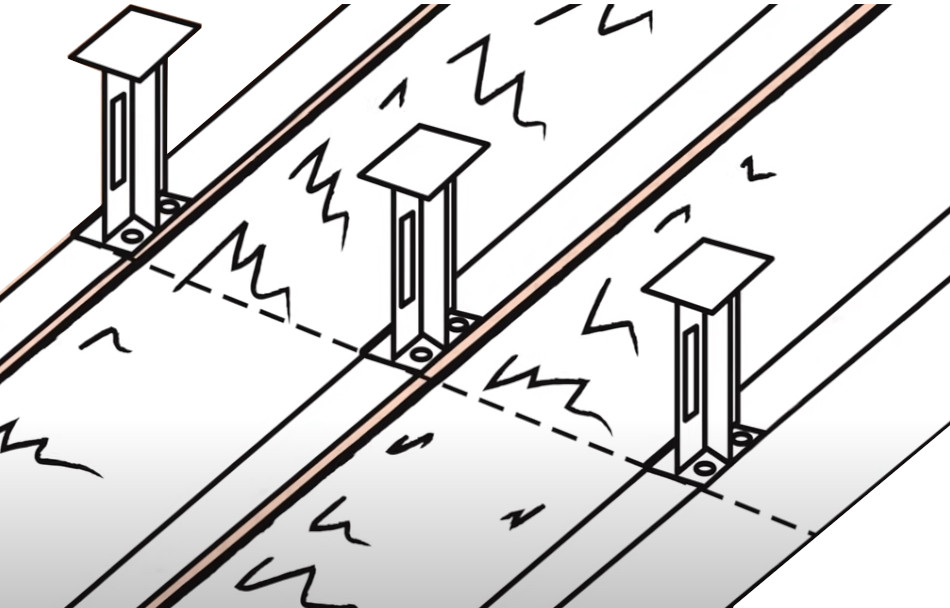
Picture credit:youyube/Wickes/How to create storage space in your loft with Wickes
Now you can secure these legs into position. If you are using loft panels ensure loft legs are 320 mm from the center of the previous row.
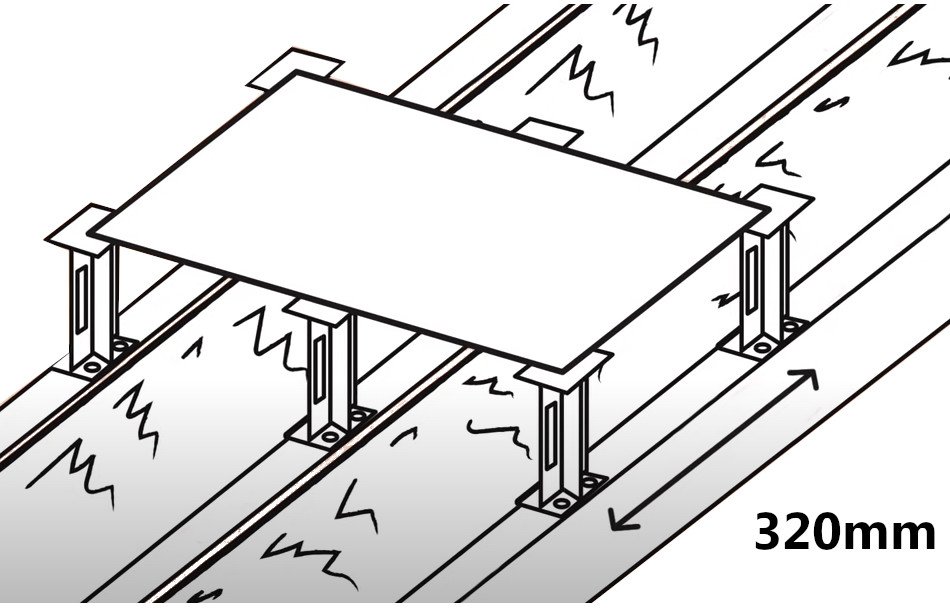
Picture credit:youtube/Wickes/How to create storage space in your loft with Wickes
You can use larger boards if you want to. But remember loft legs should be no more than 620mm apart.
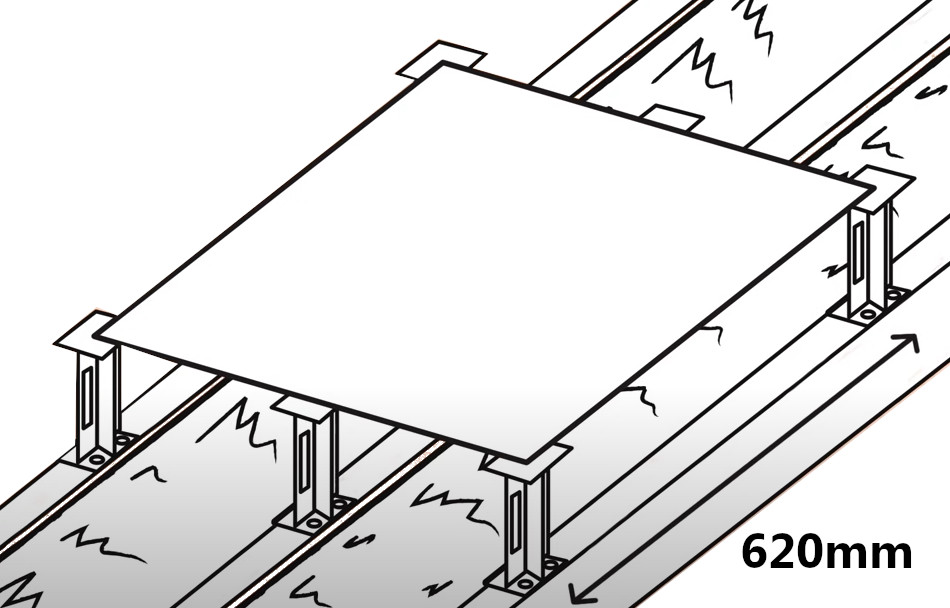
Picture credit:youtube/Wickes/How to create storage space in your loft with Wickes
Once you are satisfied with the measurements, secure the first leg of your next row into position.
As with the first row use straight edge to mark the position of the legs.

Picture credit:youtube/Wickes/How to create storage space in your loft with Wickes
Follow this process for every row.
4. FIT NEW INSULATION
Use a trimming knife to put vertical slits in your insulation so you get a good fit around the legs. You are now ready to fir storage panels.
Picture credit:youtube/Wickes/How to create storage space in your loft with Wickes
5. LOFT BOARD INSTALLATION
Remember not to compress your insulation. If you intend to board directly on to the joists instead of having a raise floor, then start by placing the first board across the joists. In most cases you will be using chipboards for your project. The chipboard soaks up moisture so always leave an air gap between the top of the insulation and the underside of the board to stop the problem of condensation. The gap just needs to be sufficient that no part of the insulation is touching the board.
For better strength, boards need to be laid in a staggered pattern, so joins don't all line up and create a weak point. Lay the first panel on top of the legs and don’t forget to leave half of the top leg visible for the next loft panel.
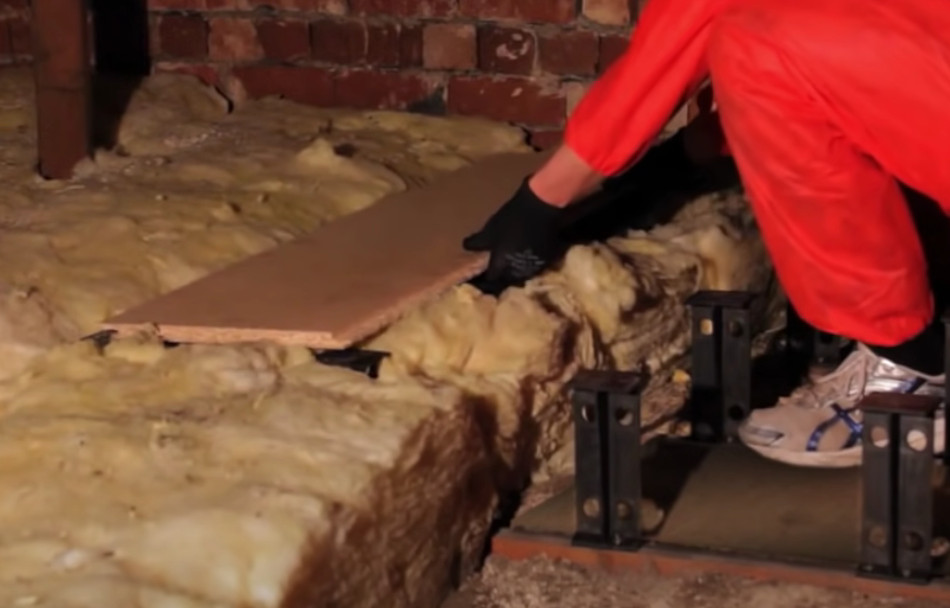
Picture credit:youtube/Wickes/How to create storage space in your loft with Wickes
Screw the loft panel to the leg using same screws as before. Cut and fit infill pieces as you go to complete the run of boards. You should pre-drill holes through the panel.
Attach the remaining panels in the same way relaying insulation as you go. And that is it!. Yor new loft storage is complete.
TIP
Remember not to overload the loft leg panels with 100 kg per m2. Don't lay insulation or boards on top of electrical cables.
WHAT SCREWS SHOULD I USE TO SCREW LOFT LEGS?
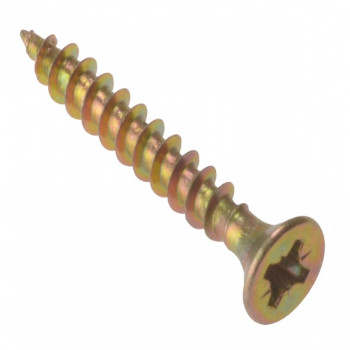 Generally speaking loft leg screws should be 300mm. Board to leg screws are longer - 400mm or more. The best screws to use are 4mmx30mm countersunk. You will need approximately 8 screws for each loft leg you are fitting.
HOW DO I KNOW IF THE CEILING JOISTS ARE STRONG ENOUGH TO SUPPORT THE LEGS AND BOARDING?
If you haven't fallen through the joists prior. They're fine. If not, they supposed to be staggered for strength.
Loft legs will carry 500kg, the maximum 100kg per square metre load is over a long period of time, so spread the weight of whatever you're storing as evenly and best you can.
BIBLIOGRAPHY
1.youtube.com, Wickes, ‘How to create storage space in your loft with Wickes’, November 17, 2014, accessed February 14, 2023
Related articles:
How to cut PIR insulation boards
7 easy tips for insyalling foil faced insulation the right way
Should I remove 80 years old insulation?
Mineral wool insulation. The ugly truth?
*All the information provided in the content published on Insulationgo blog is for informational and educational purposes only. Insulationgo LTD makes every effort to ensure the accuracy and timeliness of the content, but we do not assume any responsibility for any errors or omissions.
The information presented on this blog should not be considered as professional advice or a substitute for consulting relevant experts. Before making any purchase decisions or taking action based on the information presented here, it is strongly recommended to contact the product manufacturer directly to verify the details and ensure its suitability for your specific needs.
By using this blog, you acknowledge and agree that Insulationgo LTD shall not be held liable for any damages, losses, or inconveniences arising from the use or reliance on the information provided herein. This limitation of liability applies to all users of the blog, including but not limited to visitors, readers, and subscribers.
