


50 ǀ 60 ǀ ROCKWOOL® ABLATIVE COATED BATT INSTALLATION GUIDE*
Ablative Coated Batt is a high-density stone wool core insulation pre-coated on both sides with an additional fire protection ablative coating. To install, the Batts are simply cut and a bead of Acoustic Intumescent Sealant applied around the external edges. They are then friction fitted between the services and the wall or floor edges to completely seal the void.
In this article we will explain when the Rockwool ablative coated batt is required and how to install this fire batt step by step. By the end of this article you will have everything you need to know and all the tools that you need to buy to cut and fit Rockwool ablative coated batt insulation like a true professional.
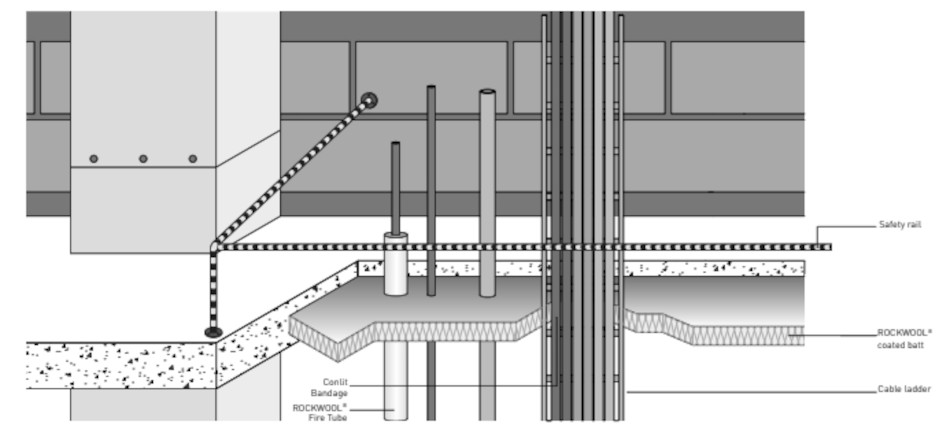
 TABLE OF CONTENTS
50 ǀ 60 ǀ ROCKWOOL® ABLATIVE COATED BATT INSTALLATION GUIDE
WHEN IS ROCKWOOL® ABLATIVE COATED BATT REQUIRED?
ROCKWOOL® ABLATIVE COATED BATT EQUIVALENT PRODUCT
TOOLS REQUIRED TO CUT ROCKWOOL® ABLATIVE COATED BATT INSTALLATION
ROCKWOOL® ABLATIVE COATED BATT INSTALLATION
BIBLIOGRAPHY
WHEN IS ROCKWOOL® ABLATIVE COATED BATT REQUIRED?
Rockwool ablative coated batt is required when voids have been created for the passage of services. This includes pipes made of plain or stainless steel, cast iron, copper, polypropylene (PP), high density polythene (HDPE), PVC and ABS along with ductwork and Dampers. Ablative Coated Batts can also be used as a ‘head-of–wall’ barrier to extend the fire resistance and acoustic performances of masonry walls that finish at suspended ceiling height, up to the concrete soffit above.
ROCKWOOL® ABLATIVE COATED BATT EQUIVALENT PRODUCT
The fire batt installation process is the same for all equivalent products such as Kingspan Safire Fire Slab, Protecta FR Board, Astroflame PFP Fire Resistant Board, SikaSeal®-626 Fire Board+ or Nullifire (Firetherm) FJ220.
TOOLS REQUIRED TO CUT ROCKWOOL® ABLATIVE COATED BATT INSTALLATION
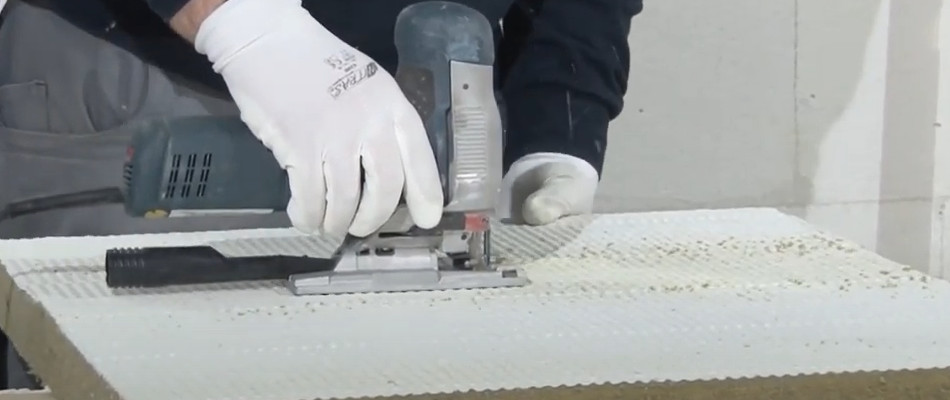
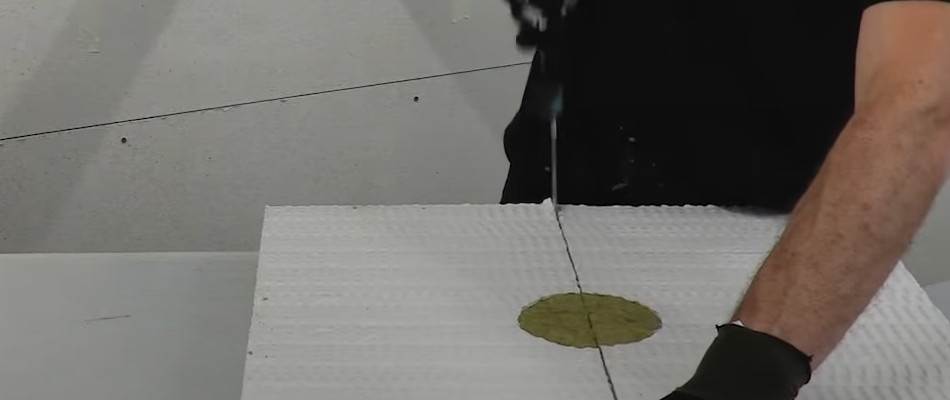
Generally speaking, Rockwool ablative coated batt insulation can be cut physically by a long blade knife or mechanically by jigsaw. To cut fire batt insulation physically, most people use long blade bread knives. The best tool for cutting Rockwool ablative coated batt mechanically is any type of Jigsaw equipped with a long blade.
ROCKWOOL® ABLATIVE COATED BATT INSTALLATION
1. Make sure that the area within the aperture is clean of any debris and remove any dust from the edges. Apply masking tape around working area.
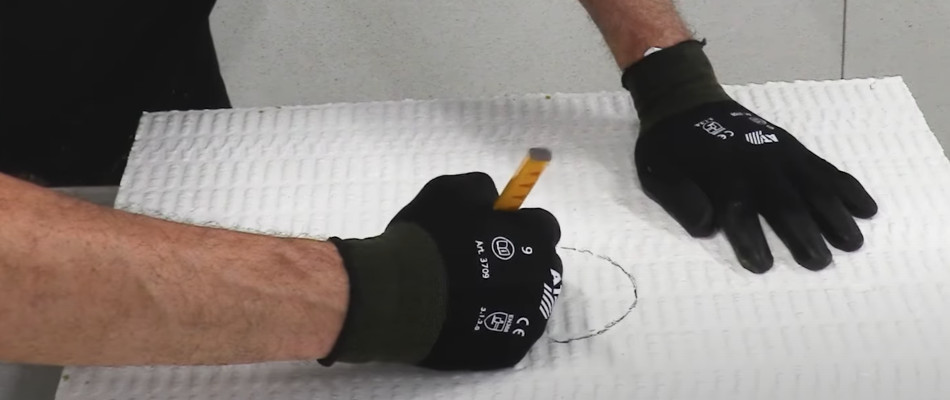
2. Transfer measurements onto the ROCKWOOL Ablative Coated Batt.
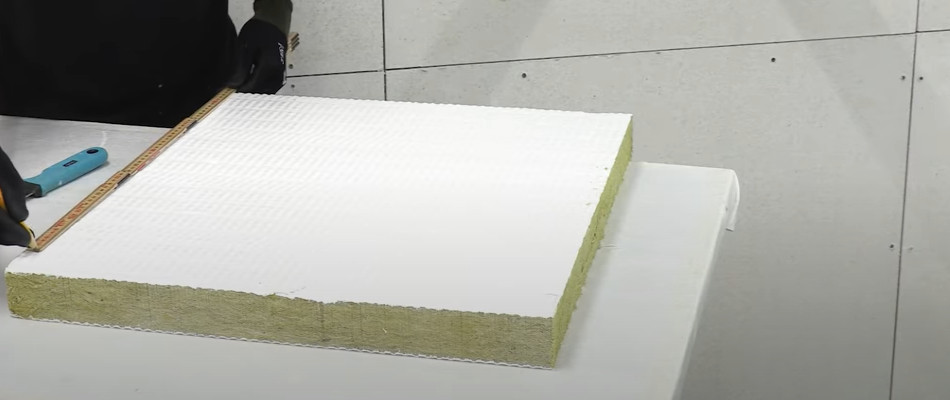
3. Mark pipe position on board. Allow 5 mm gap for intumescent sealant.
4. Cut board into half, through the pipe centre across its width at the mid-point of each rectangular hole to enable the Batt to be fitted into the aperture.
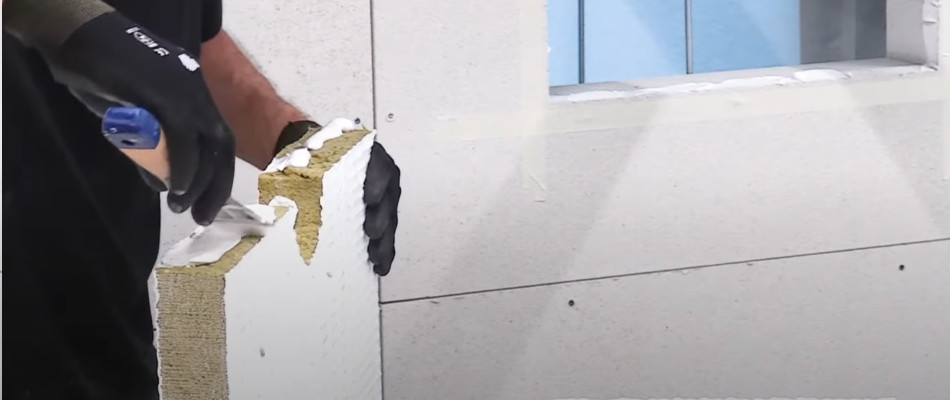
5. Trim the edges of the batt. This will make it easier to apply the sealant later.
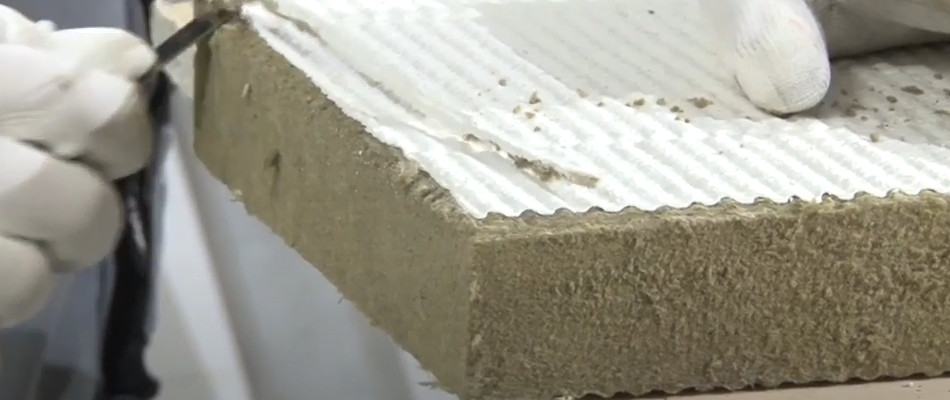
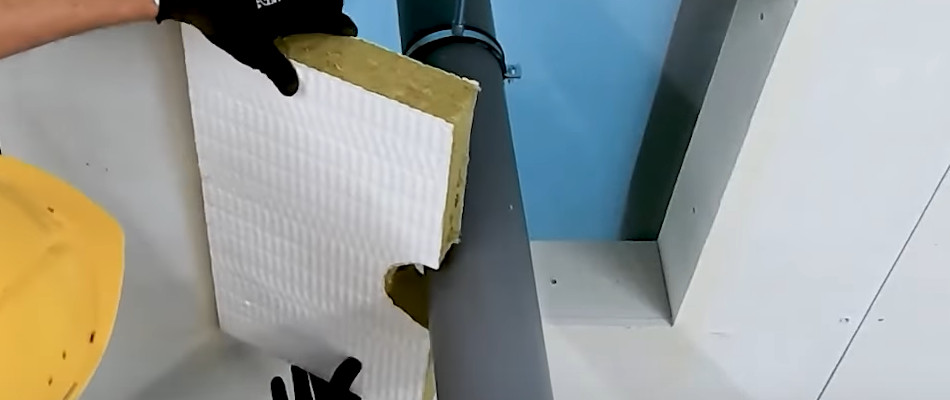
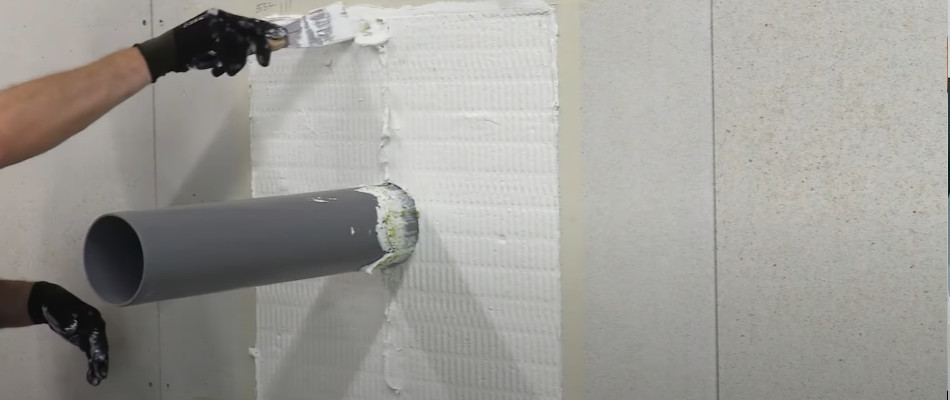
6. Cut out pipe holes thoroughly.
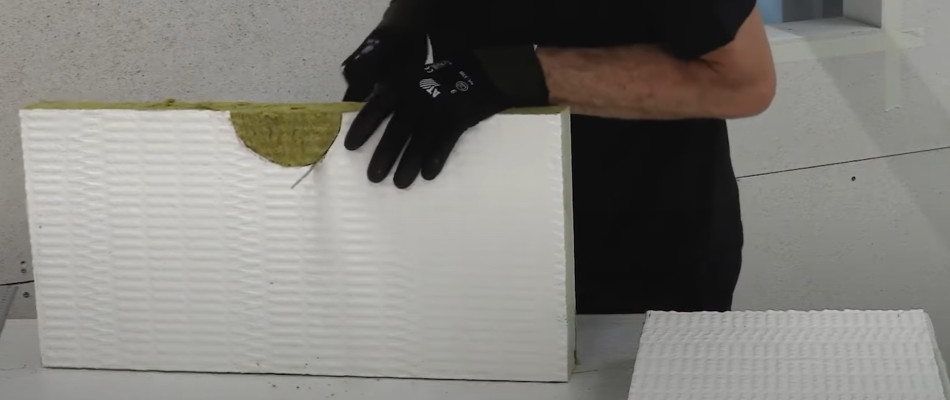
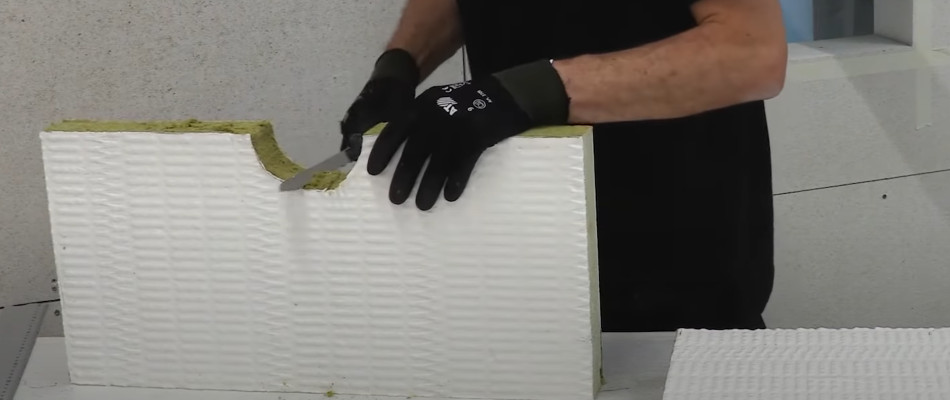
7. Cut ROCKWOOL Ablative Coated Batt to the size and shape required to fit the aperture ensuring that batt will make a tight fit with all edges of the aperture.
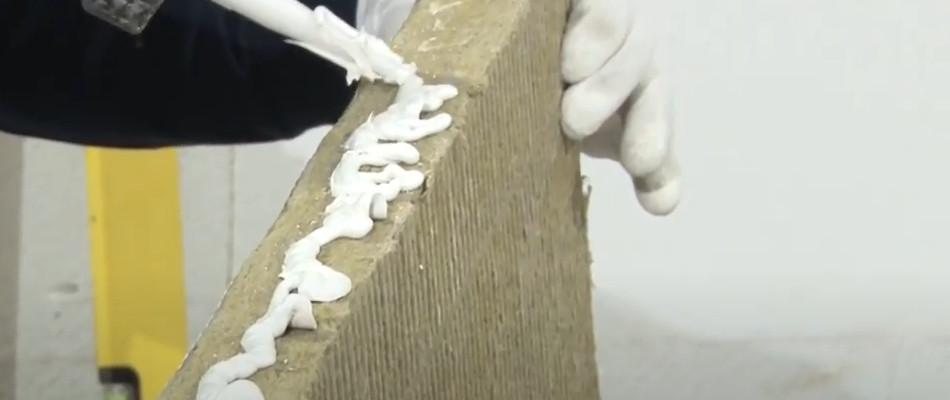
8. Apply ROCKWOOL Acoustic Intumescent Sealant to all edges of the Batt ensuring that an even cover is achieved over the entire thickness of the Batt. This should include the outer edges of the Batt and the edges of the cuts made across the Batt to allow fitting into the aperture.
9. Insert the Batt into the aperture.
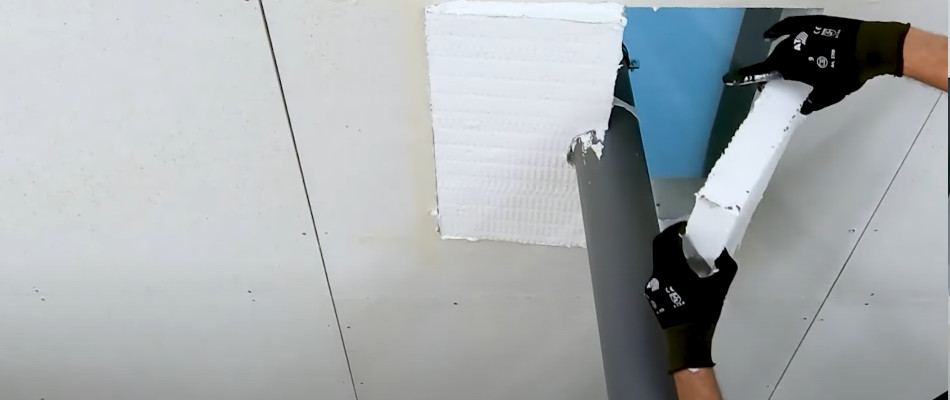
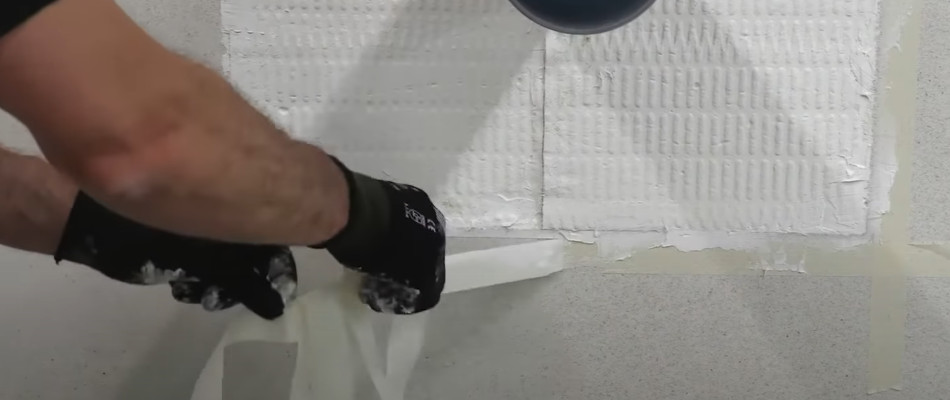
10. Apply a bead of ROCKWOOL Acoustic Intumescent Sealant approximately 15mm wide around the perimeter of the Batt ensuring that all gaps between the Batt and surrounding edges are fully filled. All joints, including those around the perimeter of the Batt, are then pointed with FIREPRO® Acoustic Intumescent Sealant to complete the seal. The joint between the Ablative Coated Batt and the pipe insulation must be pointed with the FIREPRO® Sealant.
11. Towell-off excess of sealant.
12. Remove masking tape.
BIBLIOGRAPHY
Picture credits:
1. youtube.com, Sika Australia,‘SikaSeal 626 Fire Board (internal fit)’, mpeg, accessed November 16, 2022.
2. youtube.com, Trox Hesco Schweiz AG, ‘Fire batt installation of rectangular fire damper’, mpeg, accessed November 16, 2022.
Related articles:
How to cut fibreglass insulation
Rockwool acoustic insulation slabs overview
*All the information provided in the content published on Insulationgo blog is for informational and educational purposes only. Insulationgo LTD makes every effort to ensure the accuracy and timeliness of the content, but we do not assume any responsibility for any errors or omissions.
The information presented on this blog should not be considered as professional advice or a substitute for consulting relevant experts. Before making any purchase decisions or taking action based on the information presented here, it is strongly recommended to contact the product manufacturer directly to verify the details and ensure its suitability for your specific needs.
By using this blog, you acknowledge and agree that Insulationgo LTD shall not be held liable for any damages, losses, or inconveniences arising from the use or reliance on the information provided herein. This limitation of liability applies to all users of the blog, including but not limited to visitors, readers, and subscribers.
