


EXTERNAL WINDOW SILL EXTENDER.THE ULTIMATE GUIDE TO WINDOW SILLS*
Window sills serve as both functional and aesthetic elements of our homes. They provide a platform for plants, a cozy spot for our pets, and add a finishing touch to the overall look of our windows. If you're looking to expand, renovate, or enhance your window sills, you've come to the right place.
In this comprehensive guide, we'll explore everything you need to know about external window sill extenders. From installation techniques to creative ideas, we've got you covered. Whether you're a seasoned DIY enthusiast or just starting, this guide will help you make informed decisions and transform your window sills into functional and stylish features of your living space. Let's dive in!
WHAT IS A WINDOW SILL EXTENDER? | 2✔ TYPES OF WINDOW SILL EXTENDERS / ALUMINIUM vs PVC
A window sill extension is an additional piece or attachment that is added to an existing window sill to extend its width or depth. It is often used to provide more space for placing items like plants, decorations, or to simply create a wider ledge for cats:)
Window sill overlays, also known as renovation overlays, allow you to refresh the appearance of an old window sill without the need for its removal and replacement with a new one.
There are two types of window sill extensions: Aluminium and PVC. The aluminium version is crafted from sheets of aluminium alloy and then physically bent to the desired shape, whereas PVC is poured into a mould and then moulded into specific shape.
An aluminium sill extensions are more frequently used due to their superior properties. They are resistant to the effects of sunlight, meaning they don't change colour over time, remain durable after years of use, and, most importantly, they do not corrode since they are made of aluminium.
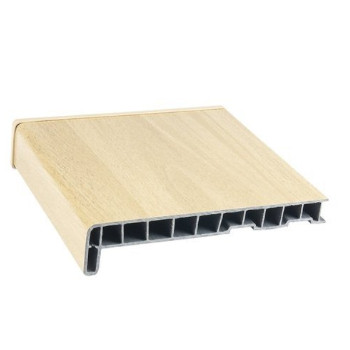
uPVC windoew sill extender
Alternatively, PVC window sill extensions are preferred in situations where installing aluminium sills could be less disruptive to the building's walls. uPVC sills are significantly cheaper, often constituting only 20% of the cost compared to aluminium versions. This makes them nearly four times less expensive than aluminium window sill extensions.
When it comes to product durability, aluminium window sills are unquestionably the top choice for window extensions. When it comes to cutting aluminium sills, although it may require a bit more precision, you can still use the same tools that are typically used for cutting plastic sills.
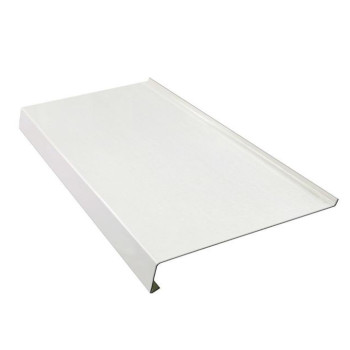
An aluminium window sill extender
Plastic window sill extensions can develop microscopic defects in their structure over the years and may become prone to easy crumbling. After prolonged use, they tend to become porous and readily collect dust and dirt from the streets. On the other hand, aluminium versions may only undergo slight oxidation, and that too, primarily in environments with elevated pH levels.
Experienced builders often claim that aluminium sill extensions have a lifespan roughly three to four times longer than plastic ones. Furthermore, aluminium window sills, when exposed to high outdoor temperatures, maintain their shape much better than plastic ones. They retain their form, preventing silicone used for their installation from spreading or deteriorating.
CAN I EXTEND MY WINDOW SILL?
We often find ourselves wondering whether and when we can extend our window sill. There are situations when it's simply impossible. For example, an old buildings often have strict restrictions or limitations on the colour and installation of window sill extensions.
On the other hand, the most common scenario for extending a window sill is during the installation of external insulation, the desire to cover an existing concrete sill, or simply when replacing old windows with new ones. If any of these situations apply, it would be advisable to inquire with the local council if there are any restrictions regarding the installation of a window sill extension. In 90% of cases, there are no restrictions, and their installation is often quite straightforward.
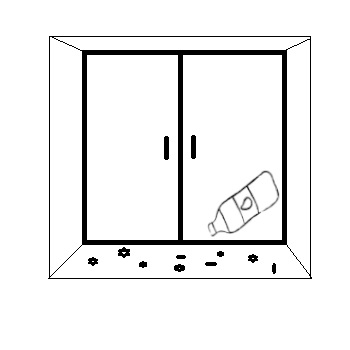
HOW FAR SHOULD A WINDOW SILL EXTENSION STICK OUT OR OVERHANG ?
When deciding to install a window sill extension, it's crucial to remember one key aspect: For effective water drainage, the external window sill extension should be set at a 1-2% angle sloping outward. It needs to extend 2.5-5 cm beyond the wall's surface. Therefore, it's best to purchase a window sill extension that is 20-30mm wider than the actual opening size.
For instance, if the physical opening from the window edge to the wall's edge measures 100mm, it is advisable to choose a sill with a width of 130mm.
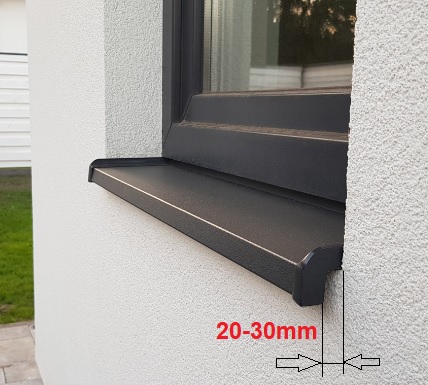
Window sill extender ‘overhang distance’
HOW MUCH DOES IT COST TO REPLACE SILLS?
When it comes to replacing aluminium window sill extensions, the most commonly chosen width is 150mm, and its cost is £56.62 excluding VAT. Such a sill allows covering one larger window (<2500mm) or two smaller ones (<1250mm each). This cost represents the material alone. Additionally, you should factor in the cost of the installation.
Assuming you hire a specialist to replace the sill, you should expect an additional cost of £200-£300 per working day, regardless of how many sills he can install within a day. Often, sills are replaced by a team that previously installed external insulation. This is closely related to the need for subsequent finishing and exterior building work.
Therefore, it can be estimated that replacing 6 average-sized sills, including both labour and material costs, will be approximately £400-£500.
DO YOU FIT WINDOW SILLS BEFORE PLASTERING / THIN COAT RENDER?
When it comes to installing window sills on the external walls of a building, it is recommended to install them before or at the latest during the installation of external insulation.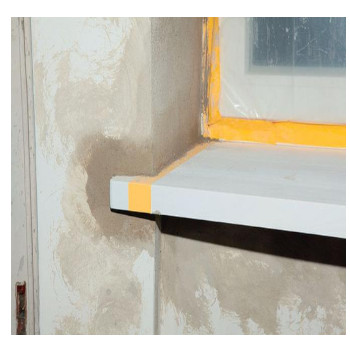
Despite the fact that they come with protective foil, it is advisable to additionally cover them with a piece of OSB or PLY board. Installing window sills before applying thin coat render seals the connections between the sill and the window reveals, ensuring proper water drainage at a specified distance from its edge.
Installing window sills after the plaster has been applied is still possible; however, it exposes us to the need to use silicone at the joints, which, as commonly known, can deteriorate and detach over the years, leading to wall dampness.
By installing window sills before plastering, you have 100% certainty that each edge is seamlessly integrated into the facade, proper rainwater drainage is maintained, and its front edge is tucked beneath the window edge, preventing water from penetrating into the interior.
HOW TO INSTALL WINDOW SILL EXTENDER?
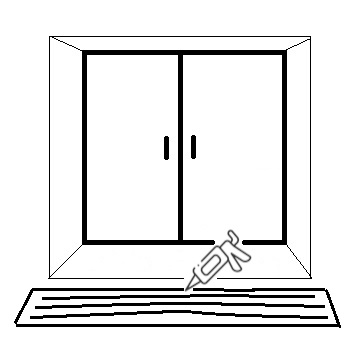
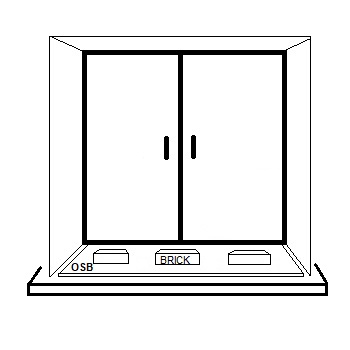
The best method for installing an aluminium window sill extender is to glue it using low expansion foam and then properly weight it down with a precisely cut piece of 22mm thick OSB board. Using foam for adhesion eliminates the creation of a thermal bridge under the window and ensures the sill's surface is sealed. Importantly, it provides rigidity across the entire surface of the sill.
Here are the 5✔ steps for fitting an aluminium window sill extender:
1.Prepare the surface - ensure that the area where you'll be attaching the sill extender is clean and free of debris. Apply PVA if needed.
2.Apply low expansion foam - apply a thin layer of low expansion foam adhesive along the backside of the sill extender where it will come into contact with the wall. Ensure that you apply it evenly to achieve proper adhesion. Adjust the foam gun to ensure that the layer applied is no thicker than 15mm. Applying a thicker layer may result in excessive foam expansion during drying, causing the sill to rise upwards. This is unacceptable, considering the need to maintain a 1-2% slope.
3.Position the sill extender - carefully position the sill extender in place, pressing it against the wall to allow the foam to adhere to both surfaces.
4.Weight it down - to ensure a secure bond, place a precisely cut piece of 22mm thick OSB board on top of the sill extender. This will help evenly distribute pressure and weight it down with 3 bricks while the adhesive foam sets.
Allow it to dry-follow the manufacturer's instructions for the specific adhesive foam you're using to determine the drying time. Typically, it takes a few hours to set, but it may vary.
5.Check and clean up – after the foam adhesive has fully cured, check the sill extender to ensure it's securely attached. Trim any excess foam that may have expanded out during installation.
By following these steps, you should have a securely attached aluminium window sill extender that is sealed and rigid, without creating thermal bridges. Be sure to use proper safety precautions and follow the manufacturer's guidelines for the adhesive foam you choose to use.
DIY WINDOW SILL EXTENDER INSTALLATION: A STEP-BY-STEP GUIDE
If hiring a professional for window sill extender installation isn't in your budget, you can become a true DIY enthusiast and do it yourself. It's not complicated and can be done with basic tools. Here are some golden tips for a simpler window sill extender installation.
Create a Water Slope:
Use a hand saw (for styrofoam) to shape the insulation with a 1-2% water slope. Ensure that the slope is directed towards one side to allow water runoff, and leave at least a 20mm clearance on both the left and right sides.
Check for Proper Contact:
Make sure the entire surface of the sill extender is in contact with the insulation. You can verify this by tapping the surface with your hand. If you hear hollow sounds, it means the sill is not properly adhered to the styrofoam. In this case, level the surface until you achieve a consistent sound.
Silicone Sealing:
Once the sill extender is in full contact with the insulation, proceed to silicone seal around the sill. It's best to use clear external silicone sealant. The clear colour is forgiving of any imperfections and is less noticeable. Apply the silicone at a 90-degree angle, not 45 degrees, to ensure proper adhesion to the window surface.
Adjust your silicone application speed to your own skill level. Do not attempt to silicone all edges in one continuous stroke. It's better to do it in sections. Start with the front side (length of the window), and then move to the left and right edges.
Finishing Touch:
Use a silicone finishing tool (available on Amazon or eBay) to easily achieve a neat finish. Keep in mind that external silicone dries relatively quickly, so it should be finished within 4-5 minutes to ensure a proper seal.
While the DIY method for installing external window sills may not be as effective as using low expansion foam, it is sufficient to ensure proper water drainage.
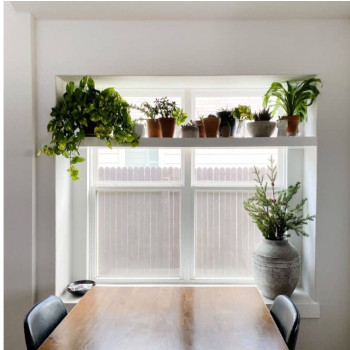
WINDOW SILL EXTENDER SHELF FOR PLANTS/CATS
Some of us choose to extend our window sills, whether it's for the love of indoor plants or our beloved cats who adore lounging on windowsills. Flower pots with a diameter larger than 150mm require an adequate sill width, just like our cats need space for their comfort. To provide the necessary support for flower pots, consider using an aluminium window sill extension like the type 761. It's a simple-to-install extension that can overhang by 30-50mm.

Picture credit:ebay.co.uk
Installing it involves cutting it to the desired size and attaching it using silicone sealant. This way, you can create more space for your plants and a cosy spot for your cats to enjoy their favourite pastime.
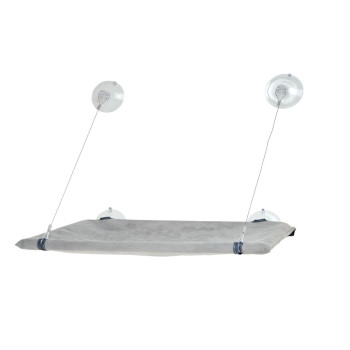
For ease of installation, there are other extensions for cats called 'cat window perches’. In appearance, they resemble window suction cups with a movable shelf.
Picture credit:ebay.co.uk
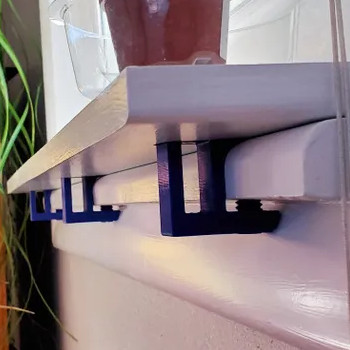
WINDOW SILL EXTENDER SUPPORT CLAMP
Some of us seek a simpler way to extend the width of window sills. Ideal for this purpose are support clamps, which can be quickly attached to an existing sill and secured with a screwdriver. Their deep profile allows for the direct placement of a wider sill, whether made of wood or PVC.
The installation is truly straightforward, and these support clamps are readily available in stores like IKEA, Amazon, or eBay. They come at an affordable cost, typically around £18.
Picture credit:printables.com
WINDOW SILL EXTENDER IDEAS
There are many creative ideas for extending your window sill, ranging from simple and budget-friendly to more complex options. Here are a few images illustrating different concepts for creating a window sill extension. These ideas showcase various ways to enhance your window sill to accommodate plants, decorations, or other functional uses while adding a touch of style to your living space.
EXPANDING A NARROW WINDOW SILL USING MDF
Picture credit:diy.com
WINDOW SILL EXTENDER SUPPORTED BY SHELF SUPPORT BRACKETS

Picture credit:organized-home.com
WOODEN EXTENSION FOR THE WINDOW SILL
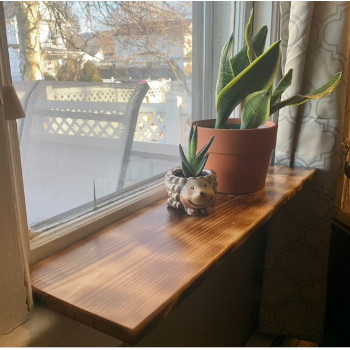
Picture credit:etsy.com
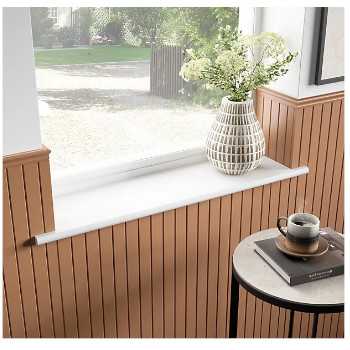
WINDOW SILL DECORATIVE SHELF
Picture credit:loveandrenovations.com
CONCLUSION
In conclusion, we have discussed various aspects related to the installation, renovation, and extension of window sills. Starting with the installation of window sill extenders, we learned that this can be done DIY style, using tools and materials readily available in any household.
Furthermore, we discovered that "renovation overlays" allow for the revitalization of old window sills without the need for removal. Additionally, we showcased various ideas for creating window sill extenders that can serve both functional and decorative purposes.
Related articles:
INSULATED PLASTERBOARD AROUND WINDOWS
THE BENEFITS OF INSTALLING 50MM GREY POLYSTYRENE INSULATION
THE HIDDEN DANGERS OF OVER-INSULATING YOUR HOME
*All the information provided in the content published on Insulationgo blog is for informational and educational purposes only. Insulationgo LTD makes every effort to ensure the accuracy and timeliness of the content, but we do not assume any responsibility for any errors or omissions.
The information presented on this blog should not be considered as professional advice or a substitute for consulting relevant experts. Before making any purchase decisions or taking action based on the information presented here, it is strongly recommended to contact the product manufacturer directly to verify the details and ensure its suitability for your specific needs.
Any descriptions, drawings, photographs, data, proportions, weights, measured values etc. given herein may change without prior notice and do not constitute the agreed contractual quality of the products. It is the responsibility of the recipient of all products to ensure that any proprietary rights and existing laws and legislation are observed.
By using this blog, you acknowledge and agree that Insulationgo LTD shall not be held liable for any damages, losses, or inconveniences arising from the use or reliance on the information provided herein. This limitation of liability applies to all users of the blog, including but not limited to visitors, readers, and subscribers.
All of this information allows for the customization of window sills to meet individual needs and preferences, making the window area both practical and aesthetically pleasing. Remember that the choice of method depends on your own skills and objectives, but regardless, you can create unique and functional solutions for your window surroundings.
