


INSULATED PLASTERBOARD OVER PLASTER*
Insulated plasterboard is undoubtedly a fantastic product. It speeds up every renovation and construction project, saves money, and above all, eliminates the need to use insulation and plasterboard separately. Its installation is usually straightforward, but it requires adhering to certain regulations. Insulated plasterboard cannot be mounted on loose surfaces. In this article, we will explore whether it's possible to install insulated plasterboard directly over existing plaster.
INSULATED PLASTERBOARD WEIGHT vs PLASTER
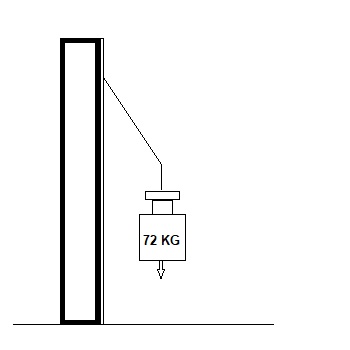
Insulated plasterboard is a compact product that not only accounts for the weight of the plasterboard itself (24kg) but also includes the weight of the insulation core (usually PIR). The insulation's weight is relatively minor, varying between 2 to 4 kg depending on its thickness. When considering the insulation's thickness, it's crucial to acknowledge that a surface area of 2.88m2 requires a stable base to ensure a strong adhesive attachment.
Good palster needs to be clean, dry, and able to endure a load of about 25 kg per square metre. Doing a simple calculation (2.88m2 x 25kg = 72kg) makes it evident that a well-done plaster should comfortably support the weight of the insulated plasterboard, which is approximately 30kg. Interestingly, in theory it could manage the weight of two layers of such material, totaling 2 x 30kg = 60kg.
In summary, a properly executed plaster should be capable of supporting the load of insulated plasterboard, which is around 30 kg.
PLASTER'S ROLE AS A SUPPORT FOR INSULATED PLASTERBOARD: ENSURING ITS RELIABILITY
The function of the existing plaster on a wall, when preparing to install insulated plasterboard, cannot be overstated – in fact, it might be one of the most pivotal aspects to consider. The question arises: how can we determine whether the existing plaster possesses the necessary strength to support insulated plasterboard?
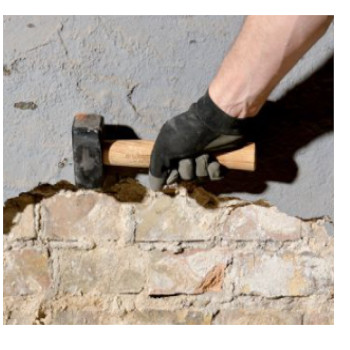
The most effective method for assessing the plaster's adequacy is by lightly tapping it with a hammer. A hollow and dull sound indicates inadequate plaster, necessitating its removal to accommodate the installation of thermal boards. Conversely, a solid and resonant sound suggests the plaster is sufficiently sturdy for insulated plasterboard attachment.
In cases where hollow spots are detected, it's imperative to remove the plaster around these areas, extending the removal to approximately 30% more surface. It's important to acknowledge that dealing with partially loose plaster carries the risk that under load, the plaster might fail entirely, resulting in the detachment of the insulated plasterboard from the wall. In such situations, employing point fixings can be ideal, redistributing the load and reducing strain on the plaster.
Furthermore, this also applies to paint on the plaster. If it turns out that the plaster is in good condition but the paint on it is peeling or loose, it's advisable to remove it before starting the installation of insulated plasterboard.
Another important step involves priming the wall using a deep penetrating primer.
This protective layer is crucial for ensuring the longevity and effectiveness of the installation. By properly priming the surface, we enhance the adhesion of the insulation boards and establish a strong base for the entire installation process.
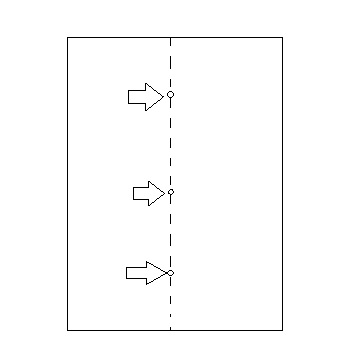
When discussing fixings to secure insulated plasterboard on walls, it's recommended to utilise around 2-3 fixings per board. These fixings should be centred on the board, with consistent spacing in mind.
CONCLUSION
Incorporating insulated plasterboard into your interior upgrades is more than just a practical decision – it's a transformative step toward enhanced comfort and energy efficiency. Throughout this guide, we've explored the intricacies of installing insulated plasterboard over existing plaster surfaces, delving into the importance of proper application and secure attachment.
By adhering to the techniques outlined here, you can ensure a seamless integration of insulated plasterboard onto plaster walls, avoiding the risk of detachment and achieving lasting results.
Remember, the key lies not only in the performance of the materials but also in the craftsmanship of the installation.
So, embark on your journey to improved interiors with the confidence that comes from understanding the process and securing the insulation that will shape your space for years to come.
Related articles:
HOW TO INSTALL INSULATED PLASTERBOARD?
INSULATED PLASTERBOARD AROUND WINDOWS
MASTERING INSULATED PLASTERBOARD FIXINGS: BEST PRACTICES FOR SOLID WALLS
A COMPREHENSIVE GUIDE TO INSULATED PLASTERBOARD FOR CEILING INSULATION
MANAGING MOISTURE: DO YOU NEED A VAPOUR BARRIER WITH INSULATED PLASTERBOARD?
INSULATION BACKED PLASTERBOARD THICKNESS
*All the information provided in the content published on Insulationgo blog is for informational and educational purposes only. Insulationgo LTD makes every effort to ensure the accuracy and timeliness of the content, but we do not assume any responsibility for any errors or omissions.
The information presented on this blog should not be considered as professional advice or a substitute for consulting relevant experts. Before making any purchase decisions or taking action based on the information presented here, it is strongly recommended to contact the product manufacturer directly to verify the details and ensure its suitability for your specific needs.
By using this blog, you acknowledge and agree that Insulationgo LTD shall not be held liable for any damages, losses, or inconveniences arising from the use or reliance on the information provided herein. This limitation of liability applies to all users of the blog, including but not limited to visitors, readers, and subscribers.
