


HOW TO FIT INSULATED PLASTERBOARD | Q2 2024 |*
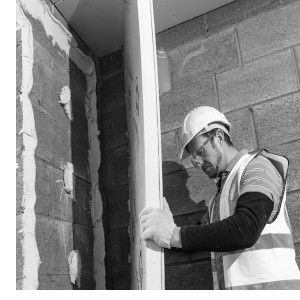
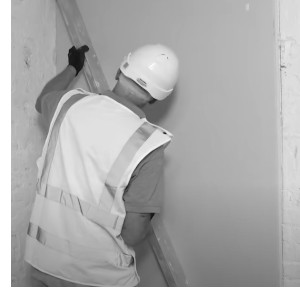
Generally speaking, it is best to insulate the wall from the outside by creating a physical barrier against cold weather conditions. However, external insulation tends to cover the facade and hides the architectural details. On the other hand, internal solid wall insulation is particularly appropriate where you need to maintain the external appearance of the building. If the building is insulated internally, the historic details of the facade are preserved. Moreover, internal insulation such as insulated plasterboard is generally cheaper to install than external wall insulation. Since insulated plasterboard is such a life-changing product, it can be installed either on brick wall, timber frame, ceiling, block wall, rafters, concrete wall, stone wall or solid wall.
In fact, insulated plasterboard being one of the most popular boards used in the UK, it is mainly used on internal walls to enhance thermal performance without adding too much depth to the wall. Therefore it has been incredibly popular due to installation time and cost.
In this article we will explain briefly how to fit, install or attach insulated plasterboard. When we talk about foam backed plasterboards either Celotex, Xtartherm or Kingspan are the best products of choice.
TIP
Internal wall insulation is generally only a route to consider for certain homes. If you insulate more than 50% of the walls of the room you need Building Regulation approval. Looking at an example of Kingspan K118 U-value for a solid wall with no insulation you want to be looking at a minimum of the foam element of the plasterboard or 50mm.
 TABLE OF CONTENTS
HOW TO FIT INSULATED PLASTERBOARD
WHAT IS INSULATED PLASTERBOARD?
INSULATED PLASTERBOARD BRANDS
INSULATED PLASTERBOARD THICKNESSES
TYPES OF INSULATED PLASTERBOARD
INSULATED PLASTERBOARD INSTALLATION METHODS
INSULATED PLASTERBOARD DOT & DAB TECHNIQUE
INSULATED PLASTERBOARD MECHANICAL FIX TECHNIQUE
USING ADHESIVE FOAM TO ATTACH INSULATED PLASTERBOARD
INSULATED PLASTERBOARD BUILDING REGULATIONS
HOW TO FIX INSULATED PLASTERBOARD TO BRICK WALL
HOW TO FIX INSULATED PLASTERBOARD TO RAFTERS
HOW TO FIX INSULATED PLASTERBOARD TO TIMBER FRAME
HOW TO FIX INSULATED PLASTERBOARD TO CONCRETE WALL
HOW TO FIX INSULATED PLASTERBOARD TO CEILING
HOW TO FIX INSULATED PLASTERBOARD TO STONE WALL
HOW TO FIX INSULATED PLASTERBOARD TO SOLID WALL
BEST WAY TO ATTACH INSULATED PLASTERBOARD TO WALL
HOW TO CUT INSULATED PLASTERBOARD
INSULATED PLASTERBOARD PRICE/COST
BIBLIOGRAPHY
WHAT IS INSULATED PLASTERBOARD?
Insulated plasterboard also called thermal plasterboard is a commonly used combination product that consists of a sheet of a standard gypsum board pre-bonded to insulating material sandwiched together into a single sheet. In fact, thermal board insulate and dry lines walls in one simple application. Moreover, it is a cheaper solution than buying both constituent parts. It is available in a variety of sizes and thicknesses, with a choice of finish and material used for the insulation.
The main use of insulated plasterboard is to line external walls, usually brick walls that do not provide effective insulation. In addition, many insulated plasterboards will act as acoustic panels that help to block sound energy. Differentiation of the types of insulated plasterboard is usually by manufacturer, size, thickness or material. All boards are easily applicable measuring 2400mm x 1200mm.
You can use the following fixings to install insulated plasterboards: masonry nails, drywall screws, plugs, hammerfix screws, adhesive foam or even plasterboard adhesive, making it an easier option for some DIY tasks. Once fixed, boards are ready for finishing. They can be either plastered with multi finish or taped jonited.
Square edge plasterboard is available if you do want to plaster the wall, leaving you with a smooth and flat finish perfect for decorating.
Alternatively, tapered edge plasterboard is available for dry-lining the surface, so the boards can be painted over immediately, perfect for new dividing walls or for cases where the wall is being upgraded to insulated plasterboard. There are many different types of insulation laminated to plasterboard. Insulated plasterboard offers either PIR core, Phenolic foam core or EPS (polystyrene) core. Depending on the design, you can choose from various types of insulation setups.
INSULATED PLASTERBOARDS BRANDS
All of the insulated plasterboard range comes from well-known brands like Celotex, Kingspan or British Gypsum so you're free to take your pick between whichever suits you. You can choose from various products such as:
- Unilin XT/TL Thermal Liner Insulated Plasterboard
- Unilin XT/TL-MR Moisture Resistant Insulated Plasterboard
- Kingspan Kooltherm K 118,
- Celotex PL4000 PIR Thermal Insulated Plasterboard,
- SR/TB Safe-R Thermal Liner,
- Knauf EPS Thermal Laminate Insulation,
- British Gypsum Gyproc Thermaline Basic,
- Gyproc Thermaline Plus, Thermaline Super,
- Xtratherm XT/TL Thermal Liner Dot and Dab,
- Xtratherm XT/TL-MF Thermal Liner Mech Fix,
- Ecotherm Eco-Liner,
- Recticel Eurothane PL,
- Siniat,
- Speedline,
- Warmline EPS insulated plasterboard.
INSULATED PLASTERBOARD THICKNESSES
Thermal insulated boards are bonded to 2 types of plasterboard. Either 12.5mm or 9.5mm wallboard. The thickness of the insulated plasterboard depends on the thickness of the underlying insulation core. For instance 15mm insulation core, 12.5mm panels are glued and so on.
The best and most popular insulated plasterboard thicknesses are: 22mm, 25mm, 30mm, 37.5mm, 40mm, 52.5mm, 62.5mm and 72.5mm.
22mm ǀ 24.5mm ǀ 27mm ǀ 27.5mm ǀ 29mm ǀ 29.5mm ǀ 30mm ǀ 32.5mm ǀ 34.5mm ǀ 35mm ǀ 37.5mm ǀ 38mm ǀ 39.5mm ǀ 40mm ǀ 42mm ǀ 42.5mm ǀ 44.5mm ǀ 45mm ǀ 47.5mm ǀ 48mm ǀ 49.5mm ǀ 50.5mm ǀ 50mm ǀ 52.5mm ǀ 53mm ǀ 54.5mm ǀ 55mm ǀ 57.5mm ǀ 59.5mm ǀ 60mm ǀ 62mm ǀ 62.5mm ǀ 63mm ǀ 64.5mm ǀ 67.5mm ǀ 70mm ǀ 72mm ǀ 72.5mm ǀ 74.5mm ǀ 77.5mm ǀ 78mm ǀ 79.5mm ǀ 80mm ǀ 82.5mm ǀ 84.5mm ǀ 87.5mm ǀ 89.5mm ǀ 90mm ǀ 92.5mm ǀ 93mm ǀ 99.5mm ǀ 102mm ǀ 102.5mm ǀ 112.5mm ǀ 119.5mm ǀ 122.5mm
TYPES OF INSULATED PLASTERBOARD
There are many different types of insulation laminated to plasterboard. Depending on the design, you can choose from various types of insulation setups. This combination product offers either PIR core, Phenolic foam core or EPS (polystyrene) core. All of them are available in a variety of sizes and thicknesses. Moreover, boards are available either in standard or moisture resistant versions.
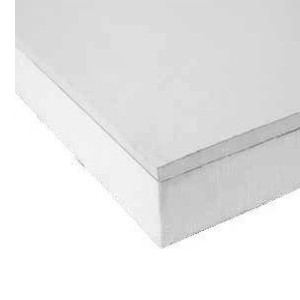
PHENOLIC CORE
 This is a high grade, phenolic foam three-in-one product for internal wall insulation used as mechanically fixed and adhesively bonded 'dot and dab' insulated plasterboard. It provides a level of performance that is unrivalled in the world of rigid thermoset insulation materials with a thermal conductivity of just 0.018 W/mK across all thicknesses. Manufactured with a blowing agent that has zero ODP and low GWP. Boards provide exceptional thermal performance for both new build and refurbishment projects. Can be plastered with either Thistle Board Finish or Thistle MultiFinish plaster. All boards are easily applicable measuring 2400mm x 1200mm. It is suitable for internal walls, roofs and ceilings applications. Kingspan Kooltherm K118 and its alternative Xtratherm Safe-R SR/TB insulated boards are the most effective type of rigid phenolic insulation boards currently available in the UK.
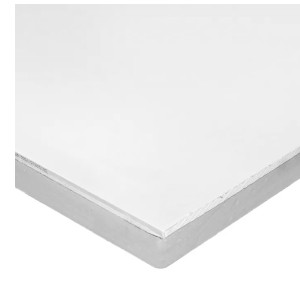
PIR CORE
 Rigid insulation panels bonded to plasterboard have a PIR foam core, which is covered on both sides with an aluminium foil. This solution is ideally suited for attics or internal walls. We get here an insulation layer along with a finishing layer. Being able to paint directly onto the surface of the new wall is convenient and saves time and money. PIR insulated boards are suitable for internal walls, sloped roofs and ceilings. These insulated plasterboards incorporate an integral vapour control layer, which helps to reduce the risk of condensation. The thermal laminates boards are suitable for direct bonding ('dot and dab') and mechanically fixed installation techniques. Both are most cost-effective insulation methods in comparison to other insulation products. PIR plasterboard is incredibly popular due to the reduction in labour and construction times. Its thermal conductivity is 0.022 W/mK .
EPS CORE
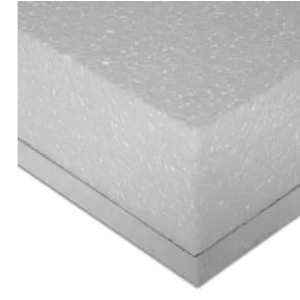 Basic, low grade expanded polystyrene foam insulation bonded to plasterboard. This type of plasterboard is normally made up of 9.5mm gypsum board, backed with a sheet of expanded polystyrene. The thickness of the insulating sheet can vary between 22mm and 50mm, depending on the insulation level needed. Can be used to line the walls of internal rooms for both new build and refurbishment projects. These types of panels are often associated with the brands such as British Gypsum or Knauf. Both brands offer thinnest insulated plasterboard as thin as 22mm thick and offer certified thermal conductivity of 0.038W/mK. Top brands are followed by Warmline EPS insulated plasterboard with its cost-effective 22mm panel offering U-value of 0.992 W/m2K. Those types of insulation are no doubt the best available options in the UK. They are quick and easy to install measuring in length 2400mm and 1200mm in width. Omitting all the details it can be said that they were all designed to be a simple and effective way to improve the thermal efficiency in both walls and roof applications.
INSULATED PLASTERBOARD INSTALLATION METHODS
Insulated plasterboard can be installed using 3 practical methods - mechanically and by glueing boards either by plasterboard adhesive or adhesive foam. Generally speaking, the construction of the wall will determine the installation method to be used. If the adhesive bond is not satisfactorily achieved due to the surface of the wall, a mechanically fixed method should be considered.
While ‘dot and dab’ methods require only plasterboard adhesive to be used, mechanical fix methods would require either masonry nails, drywall screws, plugs or hammerfix screws. Dot & Dab method would have to be used only on cavity walls and surfaces such as brick wall, block wall, concrete wall or stone wall. On the other hand, the mechanical fix method is suitable either for timber frame, ceiling or rafters.
INSULATED PLASTERBOARD DOT & DAB TECHNIQUE
Dot and Dab applications involve dabbing dots of plasterboard adhesive directly onto the wall, and then pushing the plasterboard sheet to the adhesive and allowing it to set. One such installation technique is the so called dot and dab installation method that is applied to almost any kind of wall boards, including plasterboards, plasterboards with insulation and finally all types of rigid insulation boards such as PIR, PUR and phenolic boards.
Installing thermal plasterboards with dot & dab technique is actually a really easy thing to do as long as you fully research which installation is right for your project and what thickness of insulation will achieve the U-values that you need.
Please note that almost all insulated plasterboards for dot&dab technique are paper backed. Exept Kingspan Kooltherm K118 that has low emissivity composite foil. It also have to be primed with bonding agent to back of the board.
TIP
"Dot and Dab" technique is a much easier process than having to attach battens to the wall. When you use adhesive bonding you can make up irregularities in the wall with the different thicknesses of the adhesive dab itself. Where you don't have cavities in your wall you shouldn't adhesively bond because of the risk of moisture penetration from outside. It’s generally best to look for plasterboard that’s at least 12.5 mm thick. A plasterboard of this thickness is more rigid and will improve the longevity of your walls.
Advantages: wall itself feels warm to the touch.
Disadvantages: messy job, you have to mix it up, it is not suitable for use on such walls where there is a risk of moisture penetration or on timber or steel frame construction.
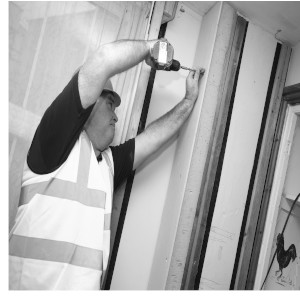
INSULATED PLASTERBOARD MECHANICAL FIX TECHNIQUE
If you don't have cavities in your wall you shouldn't adhesively bond because of the risk of moisture penetration from outside. In this particular situation you should always mechanically fix wooden battens and screw the plasterboard to battens. This technique require screws to be used. No ‘wet methods’ are involved in this process. Depending on insulation core, mechanical fix insulated plasterboards come either polystyrene backed, PIR foil backed (Xtratherm XT/TL-MF) or Phenolic backed.
TIP
 An important factor when drylining a wall is to provide fire stops along the top and bottom of each board and around all openings. Ensure framing system/battens are wide enough to offer 20mm support to all four edges of the thermal plasterboard.
Advantages: clean job, the void created between the timber battens can be used for accommodating services.
Disadvantages: timber or metal frame required, it may be expensive, you will loose space on each wall.
USING ADHESIVE FOAM TO ATTACH INSULATED PLASTERBOARD
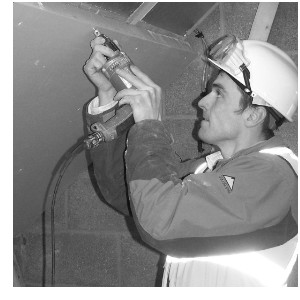
Insulated plasterboard adhesive foam also called ‘sticky foam’ is a fast curing adhesive foam that will stick thermal plasterboard boards quickly and easily, with minimal mess or waste. Insulated plasterboards such as Kingspan K118 or Celotex PL4000 can be bonded over existing plaster using low expanding PU foam adhesive, so long as the plaster is sound, solid and dry.
Low expanding PU foam can be applied to the plaster or the back of the insulated plasterboard. For more info on how to fix insulated plasterboard over plaster click here. You simply spray it on the back of thermal plasterboards. Benefit of the foam is that is sticks to a lot of things such as plasterboard, solid wall, concrete wall, brick wall, plaster, wood, metal, aluminium, stone wall, ceramic tiles, MDF, steel, lead, chipboard, bitumen and many more materials.
Instructions say to shake the can off for about 30 min seconds. Always check the manufacturer's guidelines.
TIP
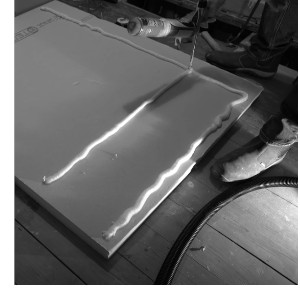 Each can should last for 5 plasterboards but in reality it lasts for 3 -4 boards. When installing, 30mm beads of adhesive should be applied around the perimeter of the board and down the centre of the board - some brands may require an additional bead of adhesive. Leave the board for 3-4 min to go a bit tacky. Once installed, add no less than 2-4 appropriate masonry fixings, per board. Increase this number to 9 if the insulated plasterboard is to receive ceramic wall tiles.
Advantages: it work out cheaper than using Dot and Dab technique, foam cures better in presence of moisture, after an hour insulated plasterboard is ready to plaster, lot tinder than Dot and Dab mixing, nothing to clean apart from a little bit of foam on the gun, good alternative to Dot & Dab technique.
Disadvantages: hard to plump the wall, you may have to hold a board for 5 minutes when foam goes off.
INSULATED PLASTERBOARD BUILDING REGULATIONS
Building Regulations are law and must be met when applied to any project over a certain size. Where 50 percent or more of the internal wall is being renovated building regulations would normally apply, and the thermal insulation of the wall would have to meet the standards required by building regulations approved documents.
The regulation that refers to the thermal efficiency requirements when carrying out renovation or replacement work on an existing dwelling is explained in Approved Document L1B (ADL1B). For instance, to meet Part L when constructing an extension you need to meet a U-value of 0.28W/m2K. When new layers are added to a thermal element through being dry lined internally the U-value of 0.30W/m2K is required.
If at least 50% of the element is being renovated then it should be upgraded to achieve the U-values as follow:
Pitched roof - insulation at ceiling level – 0.16W/m2K
Flat roof or roof with integral insulation – 0.18W/m2K
Pitched roof - insulation between rafters – 0.18W/m2K
According to building regulations insulated plasterboard should normally be at least 60mm thick, and can be up to 100mm. When we talk about foam backed plasterboards either Celotex, Xtartherm or Kingspan are the best products of choice. While Celotex offers PL4000 insulation board, Xtratherm offers XT/TL Thermal Liner. On other hand, Kingspan Kooltherm K118 range is a high-efficiency phenolic insulation core with a certified thermal conductivity (lambda value) of 0.018W/mK.
British Gypsum and its 22mm Gyproc Therma-Line Basic Insulated Plasterboard followed by 22mm Knauf EPS Thermal Laminate Insulated Board are not suitable as they don’t meet current building regulations. Therefore, 22mm, 30mm, 40mm thickness should only be used if you insulate less than 50% of your room.
HOW TO FIX INSULATED PLASTERBOARD TO BRICK WALL
Brick wall is a vertical element of construction made of bricks and mortar and is used to form the external walls of buildings. When it comes to insulating brick walls internally with thermal plasterboard, the process involves 3 building materials to be used: primer, insulated plasterboard and plasterboard adhesive.
WHAT WILL I NEED FOR THIS METHOD?
To complete a successful and professional dot and dab, you will need the following tools.
- bucket
- bucket trowel
- rasp planer
- plastering hawk
- plastering trowel
- universal saw
In terms of adhesive itself you have an option of Gyproc Drywall Adhesive, Speedline Adhesive or Knauf Plasterboard Adhesive.
INSTALLATION
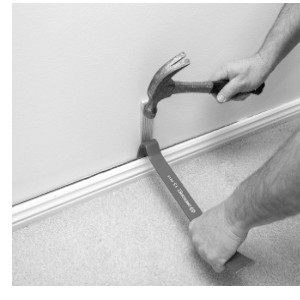
Before you start you need to remove wallpaper, skirtings, picture rails and gloss paints.
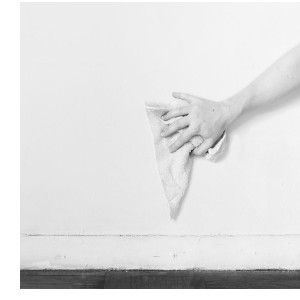
You have to make sure the wall surface is clean, stable and free of dust and loose material.
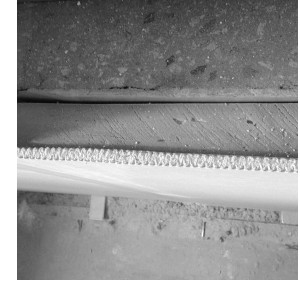
Remove some parts of the render where it's not strong enough to actually hold the weight of insulated plasterboard itself. The quickest way to do so is of course by knocking on the wall several times. Places that will make a blank, empty sound are places that need to be removed. By removing loose render you got an extra opportunity to check if the brickwork behind is completely dry.
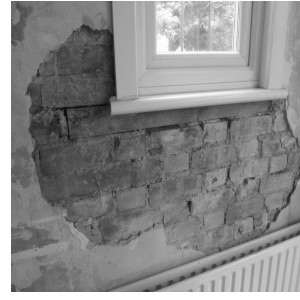
Dry walls.
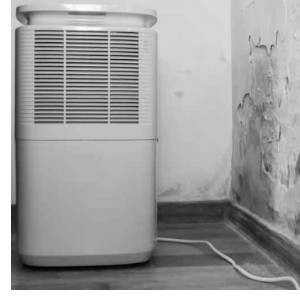
You may need a dehumidifier. Dehumidifiers can help remove moisture from the air, which indirectly removes it from the walls. Lok for one that can process 50 imp or 28,000ml of water each day. Hook up the device in the same room as the damp walls, close the windows and doors and run the device as stated in the manufacturer’s book.
TIP
You can find dehumidifiers in DIY stores and can often be hired for a few days rather than buying outright.
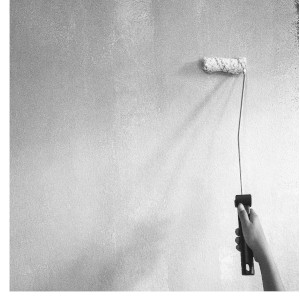
Use Primer. Apply a bonding agent to the back of the board if required. You may find this irritating because you would have thought if they design a board that is suitable for adhesive bonding you wouldn’t have to apply additional bonding agents. There is no reason why you shouldn't be using primer or PVA on the wall. Most manufacturers recommend it where you need to reduce suction or improve mechanical key. If the brickwork is dusty you must always apply a very light watered-down coat of primer. It is down to you to be absolutely sure there is no dust left before you start. If your wall system does fail in this point because of the dust, well.., you only got yourself to blame.
Mix adhesive.
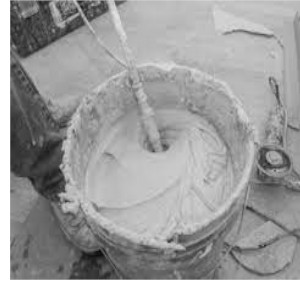
You will need to mix your adhesive by very carefully following the instructions provided on the manufacturer’s bag. To mix adhesive you should be using any old drill with mixer attachment. If you are about to do a lot of this, you are better off investing in a better power mixer. Ensure you have clean tools such as a bucket and mixing stick. Any dirt or dust may contaminate the adhesive. This is the most important step, because if you don’t have sturdy adhesive, the plasterboard will not be secure. You need to add enough water that it’s thick and holds well while being thin enough to spread. You will find that the more you practice, the better consistency you achieve. You want it to be sort of firm enough to form on the wall. If it's a bit too sloppy you wouldn't be able to do that. Once it has really nice stiffness, it is perfect and good to go on the wall.
TIP
Mixing a big batch runs the risk of you either rushing to finish or adhesive setting too early. This can happen if you find your adhesive is setting too quickly. A rushed job is a sloppy job, meaning it’ll likely perform worse than if you took your time. If your adhesive sets in the bucket, you’re out both a bucket and some adhesive. This not only costs time, but money – and you don’t want to lose either. So be smart – mix in batches!
Apply adhesive.
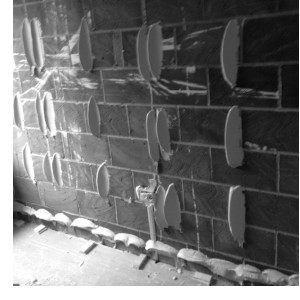
You want to apply dabs between 10mm and 20mm thick. Allow a 50mm gap between the underside of the board and the floor. You have to allow this gap on the floor because you don't want damp getting in from the floor into the underside of the plasterboard.
Apply the plaster to the wall in vertical and horizontal lines across the top, bottom and sides, and then down the centre. While this will vary based on your particular wall and needs, there are a few general guidelines to keep in mind. On average, you want your adhesive to be roughly 10mm thick, 250 mm long (roughly), and between 50 and 75 mm wide. It will take three vertical rows per board, making each dab 15-20 cm below the last. By doing so you assist the board with extra bonding strength. You have to apply this in 150mm bands around the perimeter and down the middle of the plasterboard to coincide where your decent dabs were going to be on the wall.
It is recommended 3 vertical rows of adhesive, a minimum of 22% of plasterboard area. Don't bridge the board joints with adhesive. Even though this is adhesive, you meant to apply a mechanical fixing after the adhesive has set to the plasterboard.

2-4 screws per sheet is recommended. This is to help secure the board. Being all metal it can be hammer straight into the wall. Where you got substrata like concrete block you need to use a 5mm pilot hole then use the neat neat attachment for your sds drill bit.
TIP
The quality of the job done relies heavily on the adhesive you choose to use. Depending on the manufacturer you got around 90 min to play with before glue goes off.
Adjust insulated plasterboard.
You need to mark the position of each board on the wall. That way you will easily know where to stop with your adhesive. It is a good idea when you are laying boards in position before you apply an adhesive, to draw guidelines on the floor and ceiling. That way you can simply press the board into position up to your guidelines.
You will need to cut your plasterboard to the correct size before you begin applying adhesive. When applying adhesive all around the openings of the services such as electrics it is recommended to seal those areas around with adhesive at that point. To attach it, press it onto the surface of the wall that has the pre-applied adhesive and remain in place until it is attached to the wall. You can use a level tool to tap the surface of the board and make sure it is secured to the plaster dots. If you’re worried about your plasterboard being properly straight and level, a featherhead tool can be used to smooth the surface and make sure the plasterboard is firmly fixed. Manhandle sheet until it's flush with the lines that are marked on the floor. Check with spirit level. Make sure there are no gaps between the feather edge and the plasterboard.
Advantages: speed of the installation, cheapest method.
Disadvantages: if you are not careful enough, glueing insulated plasterboard for the first time may be a messy job.
TIP
If the skirting board will be placed after the process, ensure there is a solid line of the plaster where this will be fixed.
HOW TO FIX INSULATED PLASTERBOARD TO RAFTERS
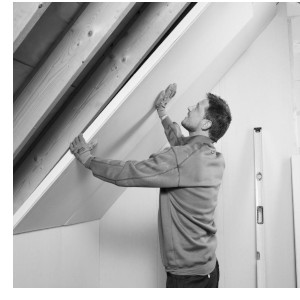
Rafter is any of the parallel beams that support a roof. They are designed to support the roof shingles, roof deck and its associated loads. When we are talking about rafter level we mean the timbers that support the pitched roof. Common rafter depths range from 100 mm to 200 mm. This limits the maximum thickness of the insulation between the rafters to between 50 mm and 175 mm. This generally would not be a sufficient thickness to achieve the U-values required to meet Building Regulations and more insulation would need to be added.
Adding another layer of insulation, either above or below the rafters reduces the effect of cold bridging through the timber rafters. In this case, it is recommended fitting Kooltherm K107 between the rafters and Kingspan K118 insulated plasterboard to the inside face of the rafters. Last layer usually involves 2 materials to be used: insulated plasterboard and insulated plasterboard fixings. If your loft is easy to access, the insulating process should be pretty straightforward and can be undertaken as a DIY job. If you have shallow rafters or just don’t care about losing the headroom, then fixing material on the underside of the rafters is the much easier way to insulate at rafter level.
INSTALLATION
Make sure you pay attention to any cracks, dry rot or damage to the rafters and the roof membrane. If it looks unsafe to work, stop what you are doing and immediately seek professional help to repair these areas.
Rafters need to be deep enough to allow the full thickness of the boards plus a 50mm air gap. The depth of the rafter will obviously influence the thickness of insulation you can fit between them, but you can always extend the rafter by attaching a wooden extension to it, since the more insulation you can fit in place, the warmer the loft space will be. This also gives a service zone for cable runs / light fittings and also a safety margin for your vapour control / airtight layer when fitting plasterboard screws.

The insulated plasterboard should be placed with the long edges running across the rafters. Marking the joists with a black marker is the important bit. Make sure you carefully mark the rafter locations at the top and bottom.
Hold the insulation in place with the drywall screws plus penny washers or helical fixings and drive them beyond the face of the insulation. You can use a nail gun or a conventional hammer and nails to do this.
Fill the gaps with expanding PUR foam. Make sure screws don't stick out proud or you will bust the plasterboard. Allow the end to get into the rafter min of 20-30mm. Make sure the screwheads are 2mm below the plasterboard surface.
TIP
You should always insulate between and above the rafters (warm roof) or between and under the rafters (cold roof). Ventilated roofs require a 50 mm air gap above the insulation. Marking top and bottom of the joists is essential. Line the laser line at it to get bang on centre every time! The thicker the insulation, the more screws you need to use to secure the board.
Advantages: speed of installation, not water involved, extra room.
Disadvantages: if rafter is not thick enough screws may get you little spots on the paint highlighting every one.
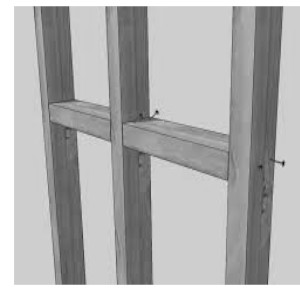
HOW TO FIX INSULATED PLASTERBOARD TO TIMBER FRAME
The term 'timber frame' typically describes a system of panelised structural walls and floors constructed from small section timber studs. As mentioned earlier, if you don't have cavities in your wall you shouldn't adhesively bond insulated plasterboards because of the risk of moisture penetration from outside. In this particular situation you should always mechanically fix timber frames or wooden battens and screw the plasterboard to them. In most of the cases with battens method you have to pack out every single band to ensure that each band is not only plumb but also lined up down the wall before you screw the plasterboard to the wall. With timber frame construction you simply build the wall from scratch, it means, you keep the level at all time, letting the wall be flat on the entire surface. In fact, installing insulated plasterboard on timber frames is one of the easiest methods. Apart from building timber frames, it requires no special knowledge. All you have to do is to keep the right distance between studs to ensure it matches the insulated plasterboard sizes. Insulated plasterboard products are dimensioned to suit studs of 90mm or 140mm at standard 600mm centres. The nominal thickness of the insulation should not be greater than the nominal stud depth. To secure insulated plasterboards you will need either drywall screws or helical fixings. Insulated Plasterboard is screwed to the timber frame at maximum 150mm centres. The boards are taper edged and should be finished using standard drylining techniques.
Advantages: speed of installation, lot tinder than Dot and Dab, void for cables and pipes.
Disadvantages: min of 162,5mm space is required, expensive method.
TIP
The use of a thermal laminate improves the thermal performance and reduces thermal bridging through the timber studs. A 50mm cavity separates the timber frame from the outer leaf, typically of brick.
INSTALLATION
Apply vapour control layer.
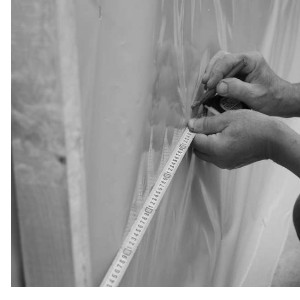
A vapour control layer is stapled to the studs across the inner face of the wall before fixing the plasterboard. A vapour permeable membrane should be stapled or nailed to the sheathing board at maximum 500mm centres. It should also be lapped. The vapour control layer should be free from holes, any gaps should be made good with any tears repaired and overlaps and apertures for services effectively sealed. Particular care is necessary around electric sockets and boxes.
Use noggins.
Ensure framing systems are wide enough to offer 20mm support to all four edges of the plasterboard. Where joints between sheets of insulated plasterboard are unsupported by the timber framing studs, timber noggins should be installed.
Screw thermal boards.
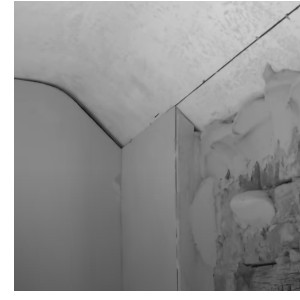
Lift the insulated plasterboard into position using wedges on the floor. Insulation should be cut back to accommodate an adjoining panel at external corners. Joints should be tightly butted. The insulated plasterboard sheets should be located centrally over the timber studs and fixed using either drywall screws at 300 mm centres (or 200 mm at external corners), or large-headed galvanised clout nails at 150 mm centres. Fixings should be driven straight with their heads embedded just below the surface of the plasterboard. The fixings should penetrate at least 25mm into the timber batten. Care should also be taken not to overdrive nails or screws.
Leave gap.
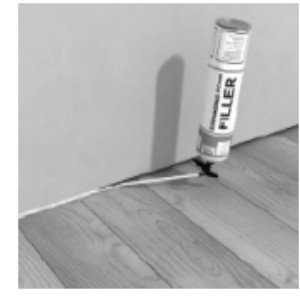
The perimeter of insulated plasterboard such as Kooltherm K118 and the 5 mm clearance gap at the base of the wall should then be sealed with a flexible sealant or equivalent. Seal and tape the joints of board to ensure a continuous vapour control layer is created. Fill any gaps with foam filler.
TIP
Installation must not be carried out until the moisture content of the timber frame is less than 20%. It is recommended that services which penetrate the dry lining (eg light switches, power outlets) are kept to a minimum to limit damage to vapour checks. In addition, any penetrations should be enclosed in plasterboard, stone mineral wool or a suitably tested proprietary fire-rated system.
HOW TO FIX INSULATED PLASTERBOARD TO CONCRETE WALL
Concrete wall is a construction material made of a mixture of cement, sand, stone, and water that hardens to a stonelike mass. Usually, this type of wall is used for large buildings. If you are about to insulate those types of walls, the installation process is no different from the one on the brick wall. Moreover, brick walls seem to be even more complicated as it may cause cracks on the wall unlike the concrete solid wall. With a brick wall you need to put more attention into preparing a wall. Concrete walls simply last longer than other building materials. It even gets stronger over time, which makes it less of a concern than other materials that require more attention through reconstruction. In both cases a technique called Dot&Dab is used.
INSTALLATION
For more info refer to ‘HOW TO FIX INSULATED PLASTERBOARD TO BRICK WALL’
TIP
A 4mm-5mm pilot hole is needed when fixing plasterboard insulation panels to concrete, depending on the strength of the masonry. Insulated plasterboard fixings can be hammered into the pilot holes with a rubber mallet or with an appropriate SDS adaptor in a lightweight SDS drill set at slow speed and with rotary action disengaged. Buy corrosion resistant stainless steel fixing for use with phenolic foam plasterboard insulation and to minimise thermal bridging. Concrete walls and insulation bonded to it manage to stay the same, unaffected by even the most violent of natural disasters.
Advantages: stability of the wall, no cracks.
Disadvantages: you may find it hard to drill the holes.
HOW TO FIX INSULATED PLASTERBOARD TO CEILING
Ceiling is the upper surface of a room that you see when you look above you. Insulated ceiling board is a more modern derivative and commonly used building material specifically designed to retain warmth better. In fact, insulated plasterboard was initially intended to line internal brick walls when both insulation and the dry lining were needed. It is now also commonly installed on old ceilings. If you are about to insulate your ceiling by using insulated plasterboard you basically have 2 options to choose from: by screwing thermal boards directly to floor joists or by using resilient bars.
Advantages: lower-cost method, improves your home’s temperature insulation properties.
Disadvantages: you may see cracks after while, not stable construction.
TIP
You should use a fireproof insulated ceiling board that has fire-resistant properties. It is recommended that you use insulated plasterboard no thicker than 9.5mm. This is important because the weight of the insulated plasterboard mustn’t compromise the ceiling. If the ceiling is lower than average, you will want to use as thin material as possible to maintain head clearance.
INSTALLATION
The process of installing insulated plasterboard is very straightforward and quick.
FIXING INSULATED PLASTERBOARD DIRECTLY TO CEILING JOISTS
- When overboarding your ceiling with insulated plasterboards, ensure you get the right fixings to fix through the insulated plasterboards and the existing ceiling into your timber ceiling joists.
- If the ceiling is damaged, stained, or saggy, it is recommended to remove the existing ceiling (an old plasterboard).
- If the existing ceiling is sagging, then attaching the insulated ceiling board directly onto the joists will eliminate sagging.
- Cut the insulated plasterboard to fit. Fixing the thermal board directly to the floor joist usually involves more offcuts. With insulated plasterboard, you will need to use a saw.
- Use clout nails or screws to fix the insulated plasterboard to the ceiling. Make sure you fix the ceiling joists as your insulated plasterboards will not stay on if you don't.
- Place them on the ceiling and nail them through the ceiling, directly into the roof joists.
- Once the insulated ceiling board is attached, strengthen the joint by inserting plasterboard (drywall) screws on either side of the nails. This step pulls the insulated ceiling board as far up as possible. Use 10 screws per square metre.
- Once the plasterboard is fully installed, you can finish the resultant ceiling in any way which suits you.
Advantages: extra space.
Disadvantages: no possibility to level the ceiling, lot more off cuts, 99% of the time, ceilings are not 100% plumb and level.
FIXING INSULATED PLASTERBOARD TO RESILIENT BARS/BATTENS
Resilient bars allow secure fixing of insulated plasterboard to timber joints while improving the acoustic insulation of ceilings. If you can see that your ceiling is bent at the centre, it is reasonable to use either resilient bars or timber battens. They are designed to be used to isolate the thermal plasterboard from direct contact with the above ceiling. They also decoupling fixing for ceilings. Resilient bar is unique as it is 20-30mm deep. Battens can be as thin as 24mm with a 30mm face. Either way, using bars or battens you can make your ceiling flat and levelled. When overboarding your ceiling with insulated plasterboards, ensure you get the right fixings to fix through the insulated plasterboards and the existing ceiling into your timber ceiling joists.
Advantages: straightened ceiling, battens will somewhat flatten out uneven ceilings.
Disadvantages: additional thickness 20mm-30mm, time consuming.
INSTALLATION
- You can run the battens either parallel or perpendicular to the ceiling framing.
- Battens are screwed using screws long enough to go through the actual batton and on the ceiling joist itself.
- Once you have done that, you need a big spirit level and use it between the battens to find lost points. As you go along, the important thing is to keep them levelled.
- It is recommended to use ‘brick pattern’ to install insulated plasterboards on the battens.
- Screw the boards with appropriate fixings such as helical fixings or drywall screws.
- Fill any gaps with expanding foam such as Ceresit CT 84 or Pinkgrip Dryfix Drywall Foam.
HOW TO FIX INSULATED PLASTERBOARD TO STONE WALL
Stone walls are a kind of masonry construction that has been used for thousands of years. Stone walls are usually made of local materials varying from limestone and flint to granite and sandstone. However, the quality of building stone varies greatly, both in its endurance to weathering, resistance to water penetration and in its ability to be worked into regular shapes before construction. If you decide to insulate a stone wall internally, unfortunately you only have one option to go for. Why? Thermal or cold bridges should be avoided as far as possible when insulating this type of wall, therefore creating physical distance is highly advisable. Due to the irregular shape of the traditional stone walls you will need more room to insulate the walls with insulated plasterboard. The best method to insulate a stone wall is to use a galvanised metal structure. This method involves start, top track and stud trims to be used in order to be strong to hold the weight of insulated plasterboard. Because of the natural coldness of the traditional stone walls, thicker insulation of at least 60mm to 70mm is required to achieve desired thermal performance.
INSTALLATION
There is not much difference between installing insulated plasterboard on the timber frame and metal frame. Only difference is that you are working with 0.7mm thick sharp metal elements, unlike softwood. This installation method requires metal parts and fine-thread drywall screws to be used.
For for information refer to ‘HOW TO FIX INSULATED PLASTERBOARD TO TIMBER FRAME’
Advantages: low cost, speed of installation, leveled wall, reduced energy bills.
Disadvantages: requires min. of 162.5mm
HOW TO FIX INSULATED PLASTERBOARD TO SOLID WALL
Solid wall is a single solid layer with no cavity section within the wall. This means the wall is literally solid from inside to outside. Solid walls are typically made from brick or stone, and are generally found within houses built before the 1930s. Therefore, the installation of the thermal insulation board is the same as for insulating a brick or stone wall.
INSTALLATION
For more information please refer to ‘HOW TO FIX INSULATED PLASTERBOARD TO STONE WALL’ or ‘HOW TO FIX INSULATED PLASTERBOARD TO BRICK WALL ’
Advantages: relatively cheap wall insulation, improves thermal comfort.
Disadvantages: solid stone wall requires metal or timber frame to be used.
BEST WAY TO ATTACH INSULATED PLASTERBOARD TO WALL
Of all the methods described, the Dot and Dab method turns out to be the best and most used. Someone might ask why? It turns out that it is the fastest and relatively cheap method. It requires less professional tools to be used. All you need is a bucket, a bucket trowel and a plastering trowel. Not much. Isn’t it? In fact, "Dot and dab" technique is a much easier process than having to attach battens to the wall. Using ‘Dot and Dab’ adhesive you can make up irregularities in the wall with the different thicknesses of the adhesive dab itself. Installing thermal boards with this technique is actually a really easy thing to do as long as you fully research which installation is right for your project and what thickness of insulation will achieve the U-values that you need. However, this method is only suitable for use on brick block or concrete cavity or rendered solid walls which are dry, stable and most importantly free from moisture penetration.
HOW TO CUT INSULATED PLASTERBOARD

Cutting thermal plasterboard is simple. The insulation boards can then be cut to size with a fine-toothed saw. You must take the proper safety precautions before cutting the plasterboard. Wear gloves, goggles, and any other safety equipment that you think is appropriate. First, you want to mark your measurements on the board. The insulated plasterboards should be cut approximately 5mm short of the floor to ceiling height. Small mistakes lead to gaps, which can compromise the thermal efficiency of your plasterboard. Second, lay the plasterboard on a flat, clear surface. You need to use an extremely sharp knife that can cut through both the insulation and the plasterboard for a clean, concise finish.
INSULATED PLASTERBOARD PRICE/COST
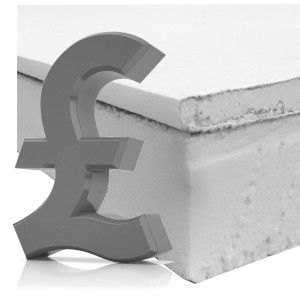
The price of insulated plasterboard varies according to the thickness of insulated plasterboard, length, brand and type of plasterboard. Because plasterboard can be used in so many different situations, it is important to know you’re getting the best price, particularly if you’re working within a tight budget. The cost of most commonly used thicknesses are:
PHENOLIC CORE:
62.5mm Kingspan Kooltherm K118 - £99.64
62.5mm Xtratherm Safe-R Thermal Insulated Plasterboard - £92.50
PIR CORE:
62.5mm Xtratherm XT/TL Thermal Liner Insulated Plasterboard - £71.52
62.5mm Celotex PL4000 PIR Thermal Insulated Plasterboard - £89.30
63mm BG Thermaline PIR Gyproc Insulated Plasterboard - £79.80
EPS CORE
22mm Gyproc Thermaline Basic Insulated Plasterboard - £32.56
22mm Knauf EPS Thermal Laminate Insulation Board - £30.42
If you are looking for the plaster-boarding cost per m2 or single sheet K118 just call 02081910776. Here at InsulationGo we offer top brands at affordable prices. You can choose between:
Phenolic insulation bonded to plasterboard,
PIR insulation bonded to plasterboard,
PIR insulation bonded to moisture resistant plasterboard,
EPS/Polystyrene bonded to plasterboard.
The costs given here are given in good faith as an indicative guide only and should be used with understanding. Insulationgo Limited cannot accept any liability for any budget produced using these figures.
BIBLIOGRAPHY
Picture credits:
1.goodwins.com, ‘Xtratherm Insulated Plasterboard’, ’s3-eu-west-1’, jpg, accessed September 8, 2022.
2. builderdepot.com, ‘57.5mm Kingspan Kooltherm K118 Insulated Plasterboard’, jpg, accessed September 6, 2022.
3. cutpriceinsulation.co.uk, ‘EcoTherm Eco-Liner 2400mm x 1200mm x 50mm + 12.5mm Insulated Plasterboard’, jpg, accessed September 4, 2022.
4. southern-timber.co.uk, ‘Celotex PL4000 Insulation Plasterboard Backed’, jpg, accessed September 8, 2022.
5. homebuilding.co.uk, ‘Internal Wall Insulation: What are the Pros and Cons?‘, jpg, accessed September 8, 2022.
6. youtube.com, ‘Using Adhesive Foam To Attach Insulated Plasterboard’, mpeg, January 21, 2021, accessed September 6, 2022.
7. thespruce.com, Ruthie Darling, ‘How to Clean Walls Before Painting’, jpg, February 25, 2022, accessed September 3, 2022.
8. diynot.com, ’Render over brick and wood on interior wall’, jpg, May 30, 2014, accessed September 6, 2022.
9. restorationlocal.com, JEFF ROOKS, ’How to Dry Water Damage With a Dehumidifier’, jpg, January 8, 2022, accessed September 6, 2022.
10. thebalancesmb.com, JUAN RODRIGUEZ, ’Applying a Primer Coat Before Painting’, jpg, January 04, 2021, accessed September 3, 2022.
11. dreamyhome.co.uk, Dale Richardson, ‘Dot And Dab Thickness And How To Apply’, jpg, accessed September 7, 2022.
12. plasterersforum.com, ‘Dot and dab is this wrong?’, jpg, May 08, 2017, accessed September 7, 2022.
13. youtube.com, siniat.uk, ‘HOW TO - Beat the cold by installing Siniat Thermal Boards’, mpeg, October 28, 2015, accessed September 1, 2022.
14. youtube.com, Charlie, ‘How to Dot & Dab Insulated Plasterboard - a DIY Guide’ February 24, 2019, accessed September 1, 2022.
15. positech.co.uk, cliffski ‘Attic Insulation again…’, jpg, March 2,2011, accessed August 24, 2022.
16. kingspan.com, ‘Why you can’t just Insulate Between the Rafters‘, jpg, April 2, 2022,accessed August 22, 2022.
17. thorhelical.com, ‘Mechanical Fixings for Insulated Plasterboard’, jpg, accessed September 7, 2022.
18. youtube.com, Twistfix, ‘Insulated plasterboard fixings for fitting plasterboard insulation’, mpeg, September 7, 2022.
19. wiki.diyfaq.org.uk, ’Building a wall’, jpg, November 01, 2021, accessed September 7, 2022.
20. youtube.com, BSO, ‘Celotex PL4000 Insulation Board’, mpeg, October 4, 2012, accessed September 7, 2022.
21. kingspan.com, ‘Kooltherm K17 Insulated Plasterboard’, jpg, accessed September 7, 2022.
22. gyproc.ie, ‘Timber joist’, pdf, accessed September 7, 2022.
23. mdoshea.ie, ‘50mm insulated plasterboard’ | 8FT X 4FT’, jpg, accessed September 3,
Relative articles:
How to cut polystyrene insulation
THE POWER OF ULTRA THIN INSULATED PLASTERBOARD
WORRY-FREE TV SETUP: HOW TO SECURELY MOUNT YOUR TV ON INSULATED PLASTERBOARD
HOW TO PROPERLY INSTALL INSULATED PLASTERBOARD ON EXTERNAL CORNERS
INSULATED PLASTERBOARD AROUND WINDOWS
THE PERFECT FIT: INSULATED PLASTERBOARD DIMENSIONS AND OPTIONS
INSULATED PLASTERBOARD OVER PLASTER: SHORT INSTALLATION GUIDE
MASTERING INSULATED PLASTERBOARD FIXINGS: BEST PRACTICES FOR SOLID WALLS
A COMPREHENSIVE GUIDE TO INSULATED PLASTERBOARD FOR CEILING INSULATION
WHAT IS THE NEWEST FUTURE INSULATION?
Decorative wall panels. The ugly truth?
5 Benefits of Insulated Plasterboard.
Internal wall insulation - is it risky?
The easiest way to cut PIR board. Celotex, Recticel, Xtratherm and Kingspan.
An exceptional performance of rigid phenolic foam.
How to Dot & Dab thermal wall insulation boards. Kingspan K118, Xtratherm XT/TL.
Rigid insulation board bonded to plasterboard. How does it sound?
*All the information provided in the content published on Insulationgo blog is for informational and educational purposes only. Insulationgo LTD makes every effort to ensure the accuracy and timeliness of the content, but we do not assume any responsibility for any errors or omissions.
The information presented on this blog should not be considered as professional advice or a substitute for consulting relevant experts. Before making any purchase decisions or taking action based on the information presented here, it is strongly recommended to contact the product manufacturer directly to verify the details and ensure its suitability for your specific needs.
By using this blog, you acknowledge and agree that Insulationgo LTD shall not be held liable for any damages, losses, or inconveniences arising from the use or reliance on the information provided herein. This limitation of liability applies to all users of the blog, including but not limited to visitors, readers, and subscribers.
