


PERFORATED CLOSURE / INSECT MESH/ ALUMINIUM PROFILE. YOU NAME IT!*
To make sure that you obtain the best performance from any cladding system, perforated closure was invented. Over perforated closure trim might not be a good thing. Same with an under perforated closure, which might not be a good thing either. Buying wrong perforated closure may obviously cause issues on your cladding system or you might not be getting all the performance out of the cladding system that you expected. There are also other factors to consider when choosing perforated closure. One of the biggest concerns is moisture intrusion. Second is material and the gauge are being made out of. Further in this article, you can find all relevant information about perforated closure.
 TABLE OF CONTENTS
- PERFORATED CLOSURE/INSECTMESH/ALUMINIUM PROFILE. YOU NAME IT!
- WHAT IS PERFORATED CLOSURE?
- PERFORATED CLOSURE. WHERE CAN BE USED?
- TYPES OF PERFORATED CLOSURES
- PERFORATED CLOSURE vs WIND
- PERFORATED CLOSURE vs CONDENSATION
- PERFORATED CLOSURE vs BUILDING REGULATIONS
- PERFORATED CLOSURE INSTALLATION
- PERFORATED CLOSURE CUTTING
WHAT IS PERFORATED CLOSURE?
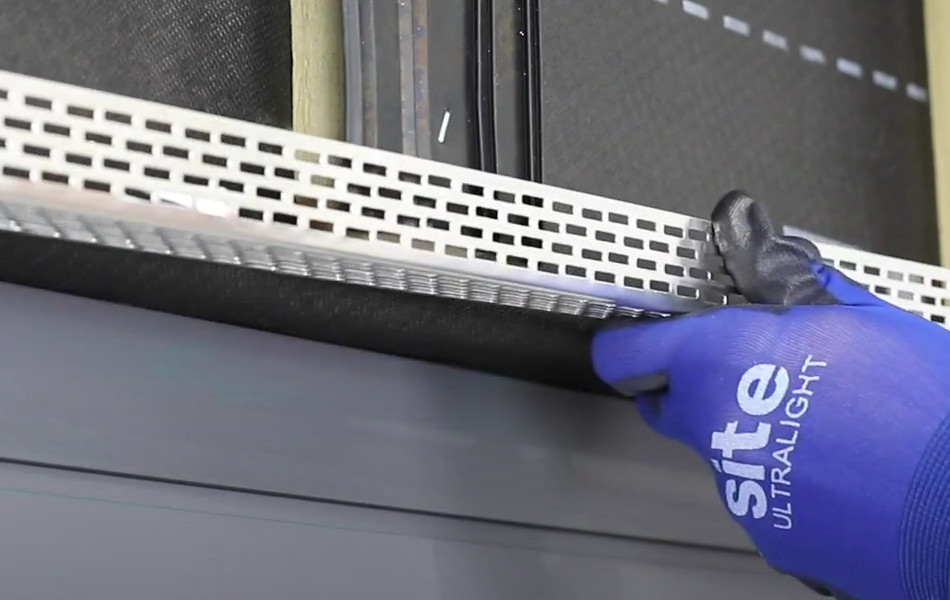
Perforated closure is an L-shape corrosion-resistant aluminium piece with small rectangular holes installed at the base, top, and above and below window frame openings on the top and bottom of the sub-frame. Trim is created with perforations as a venting detail. In other words, those small perforations measuring 3mm x 10mm allow the hot air to escape in summer, preventing cladding from bending.
In fact, perforated closure is an essential aspect of any cladding project being used for venting details.
Perforated closure also stops debris and water. Which means it is the primary defence of keeping your cladding system water tight. It also prevents small insects and rodents from entering therefore is also called insect mesh.
PERFORATED CLOSURE. WHERE CAN BE USED?
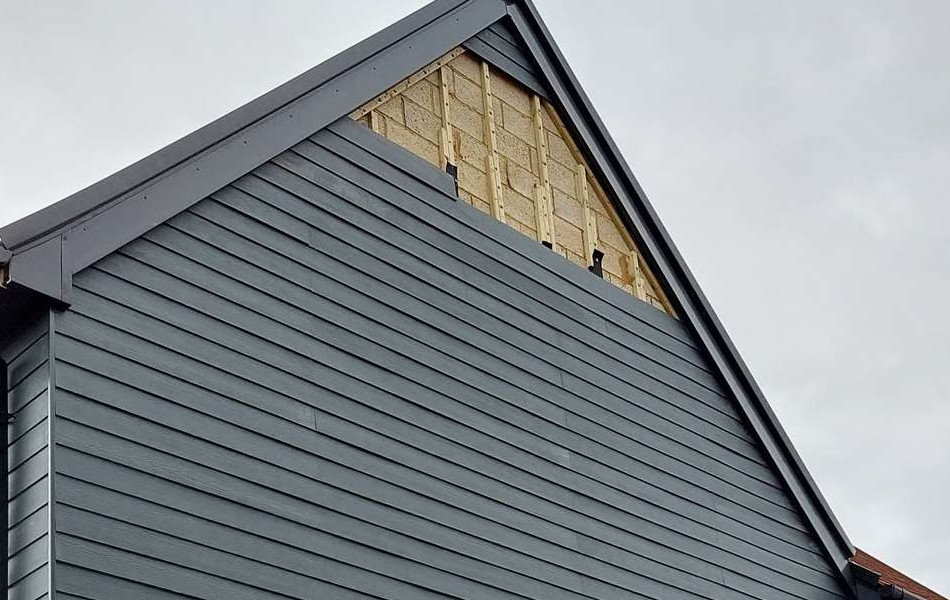
One of the reasons we bring up this topic is, this perforated closure is used a lot. There wouldn't be just one single way to use perforated closures out there. The can be used in several different ways such as cladding, as a ventilation channel when thermal plasterboard is mechanically installed, rainscreen systems, shop refrigerators or as a ventilation duct in rooms with high humidity. Perforated closures are often associated with cladding systems such as Cedral, Hardie backer, Benx Supertech, Wienerberger SVK or Millboard Envello.
TYPES OF PERFORATED CLOSURES
Perforated closures are available in various widths:
40mm ǀ 50mm ǀ 70mm ǀ 100mm
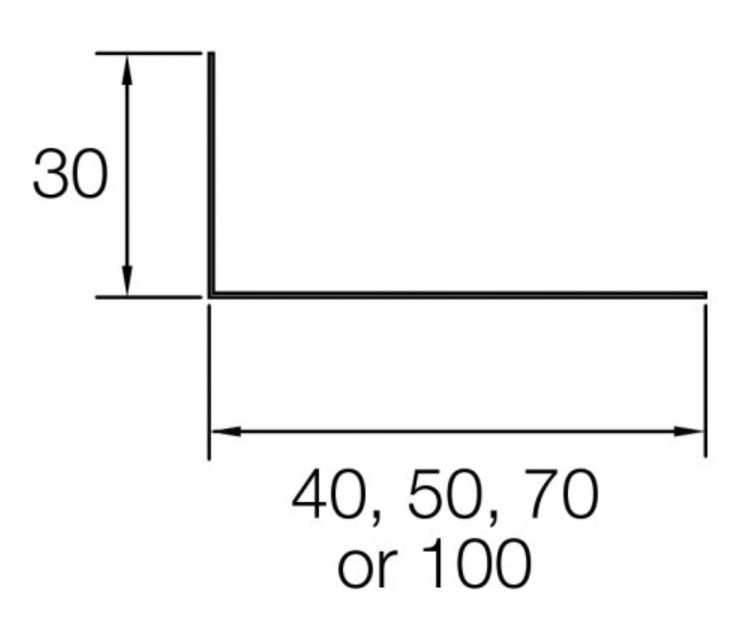
The width of perforated closure is usually related to timber batten thickness and often to prevailing winds in this particular area.
Depending on the application, they come in two types:
-single side perforation plus plain side used as a decoration element
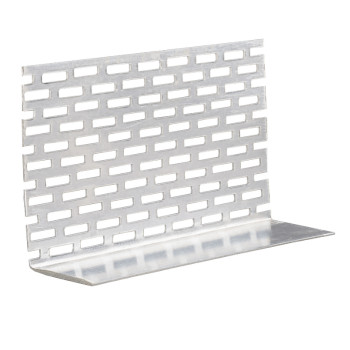
-double sided perforation used as a ventilation detail
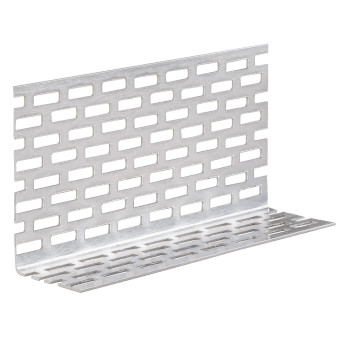
Both types of perforated closures have the same dimensions: 100mm long leg and 30mm short leg. For transport purposes trims are supplied in 2.5m and 3m lengths. Each perforated closure weighs approximately 0.55-0.65kg and usually manufactured using high quality 1050 grade aluminium.
The most commonly used perforated closure is the double perforated one. Generally speaking it is easier to install having holes on both sides which makes trim more versatile.
PERFORATED CLOSURE vs WIND
When installing perforated closures it is important to fully understand the wind loading of the cladding structure that the product is being applied to. If the wind loading exceeds 1.0kN/m2 additional timber battens should be installed between the standard battens to increase the performance of the sub structure and the perforated closure impact resistance.
The wind actions on the wall should be calculated in accordance with BS EN 1991-1-4 : 2005 and its UK National Annex. Special consideration should be given to locations with high wind load coefficients as additional fittings may be necessary. In accordance with BS EN 1990 : 2002, it is recommended that a partial load factor of 1.5 is used to determine the design wind load to be resisted by the system. If your building is subject to high wind loading then your timber battens may need to be reduced to 400mm centres.
There are manufactures that will list their testings that are rated for 11-mile an hour wind ratings.
Picture credit:kentonline.co.uk
PERFORATED CLOSURE vs CONDENSATION
Perforated closure is recommended to be used where minimum 38mm thick timber batten to create a free following cavity behind weatherboard cladding. It is recommended that the cavity has a minimum 5000mm2/m run of ventilation. Based on timber batten recommendation being 38mm this will provide the necessary cavity for this requirement.
PERFORATED CLOSURE vs BUILDING REGULATIONS
If you don’t know how much air you’re moving, then you don't know how the cladding system is going to perform. Therefore perforated closure should be installed incompliance with National Building Regulations. General guidance on maximum height is set out below Dwellings - maximum height
England, Scotland, Northern Ireland & Wales - 18m.
In addition to single dwellings in England a maximum height of 18m is implemented on multiple dwellings. In Scotland, the boundary condition needs to be assessed.
As an alternative to timber battens consideration to the use of a non-combustible steel frame should be given in accordance with national regulation.
PERFORATED CLOSURE INSTALLATION
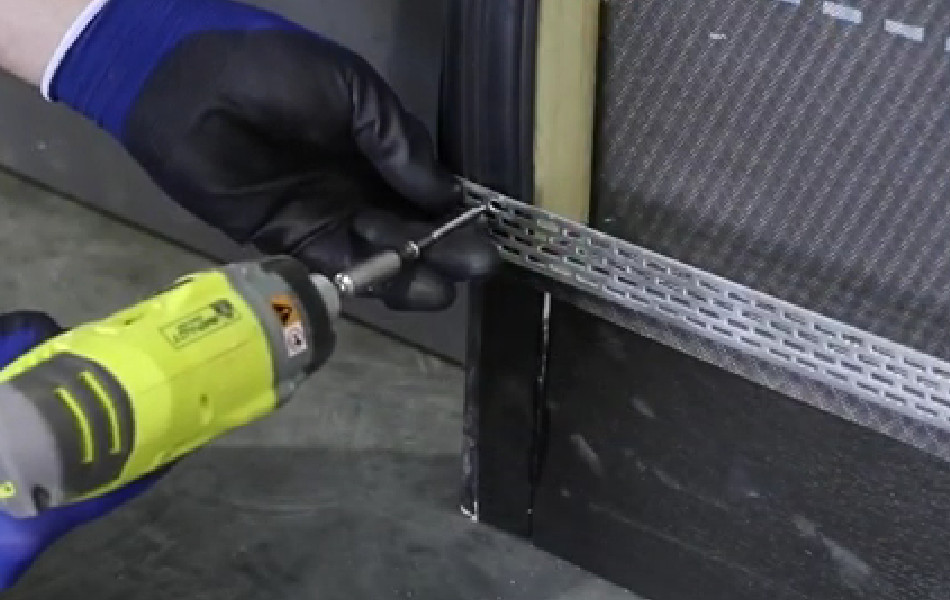
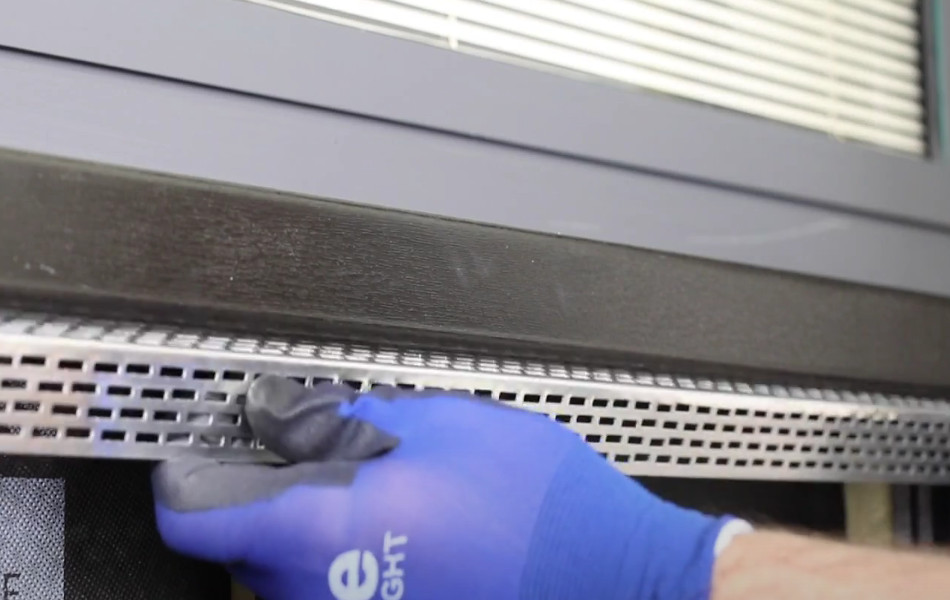
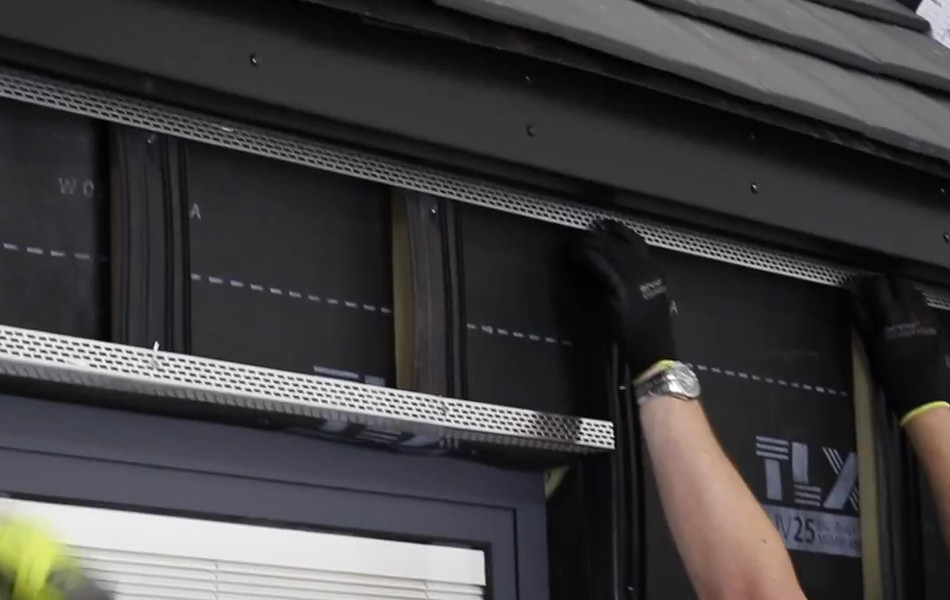
Perforated insect mesh is fixed at the bottom of the cladding with the starter trim, also at the top on its own, as well as with the corner profiles. There are a number of different ways to install perforated closure, however, the overall principle is the same. In order to ensure ventilation, a minimum of a 38mm clear cavity is required behind the weatherboard. Perforated closure must be fitted at the bottom of the installation, below window sills, above window heads and at the top of installation along the soffit line. Perforated trims can be fixed to the front of the battens using the 20mm fixings. When hand nailing there is no requirement for pre-drilling providing the nail placements are at least 50mm from the edge of the trim.
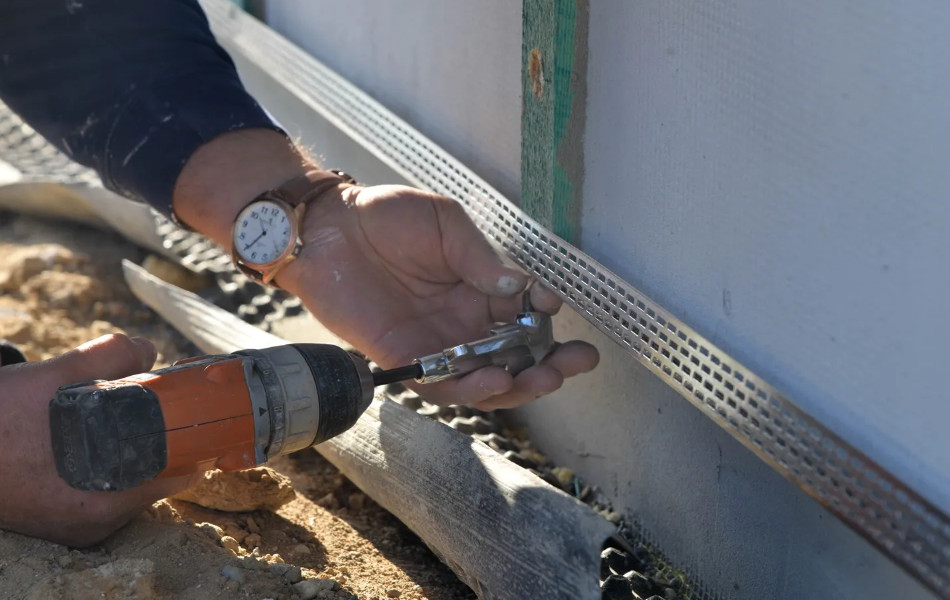
At the base and head as well as the window and door heads and sills a 10mm continuous opening should be left. You will also need to ensure the perforated closure is perfectly level before fixing to the wall, as the fibre cement starter strip will be fixed to the perforated closure. If your closure is not fitted parallel, you may be at risk of having an unlevel installation.
PERFORATED CLOSURE CUTTING
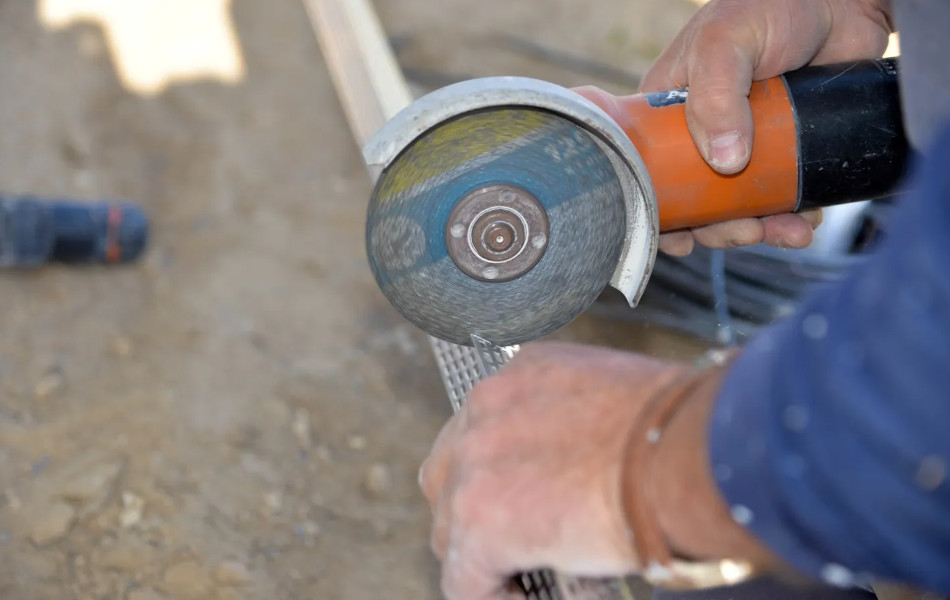
Perforated closure can be cut, drilled and nailed with conventional woodworking tools in a similar fashion to timber. There are a number of different cutting methods to choose from.
You can cut perforated closure physically with a hand saw equipped with a fine metal blade or electronically with an angle grinder. When a perforated closure is cut by an electric angle grinder it is advised that you turn the trim over to ensure a clean finish on the front side of the insect mesh.
Cutting and drilling should be carried out in a dry and well-ventilated area with all cuts being wiped to remove dust with a clean, dry cloth. A test cut is always recommended.
Bibliography
1.youtube.com “Cedral Lap Chapter 1 - Getting Started” March 16, 2018, accesed February 1, 2023
Related articles:
Cedral Cladding and Frequently Asked Questions
Cedral cladding. Lap or Click?
Fibre cement cladding technology
How to install Cedral Click Cladding
How to clean fibre cement cladding?
Weatherboard Touch Up Paint for Cedral
How much is Cedral cladding per square Metre?
Cedral Weatherboard. Timeless façade board?
*All the information provided in the content published on Insulationgo blog is for informational and educational purposes only. Insulationgo LTD makes every effort to ensure the accuracy and timeliness of the content, but we do not assume any responsibility for any errors or omissions.
The information presented on this blog should not be considered as professional advice or a substitute for consulting relevant experts. Before making any purchase decisions or taking action based on the information presented here, it is strongly recommended to contact the product manufacturer directly to verify the details and ensure its suitability for your specific needs.
By using this blog, you acknowledge and agree that Insulationgo LTD shall not be held liable for any damages, losses, or inconveniences arising from the use or reliance on the information provided herein. This limitation of liability applies to all users of the blog, including but not limited to visitors, readers, and subscribers.
