


Cedral Click Installation Guide*
External cladding can help protect the structure of your property from cracks and can also dramatically transform the overall look of your home.
There are many reasons why you may want to fit cladding to the exterior of your home.
Here we have outlined a step by step guide so you can do it easily by yourself. We cover here Cedral click system.
1. Getting started
Battens has to be fixed to the building with spaces of no more than 600mm between the centres. This may have to be decreased in areas of high wind loading.
The battens used must be the correct size:
Batten size for single fixings: 75mmx38mm
Batten size for joints: 100mmx38mm
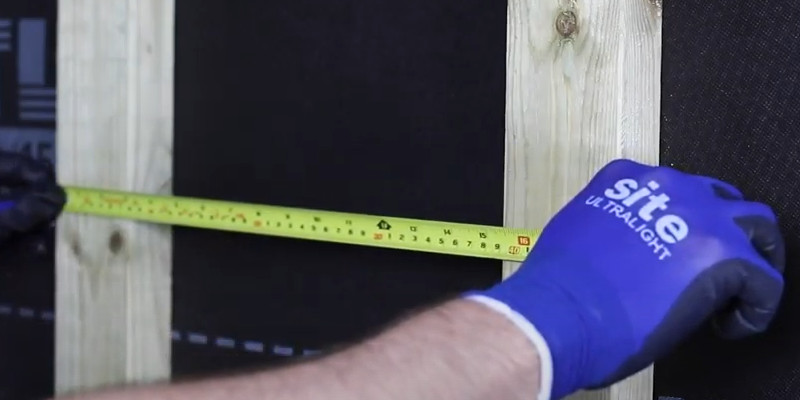
Battens distance required for Cedral cladding
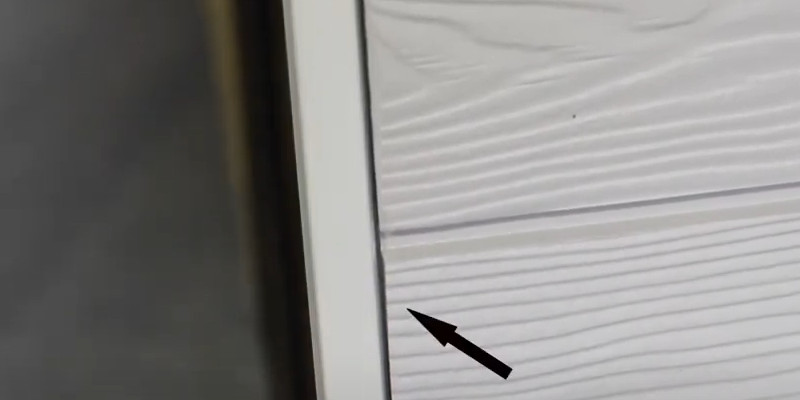
A clear cavity space of a minimum 30mm should be left to the rear of the planks.
The battens are installed. There must be a gap left between the top of the batten and the underside of the soffit. That is a minimum of 10mm.
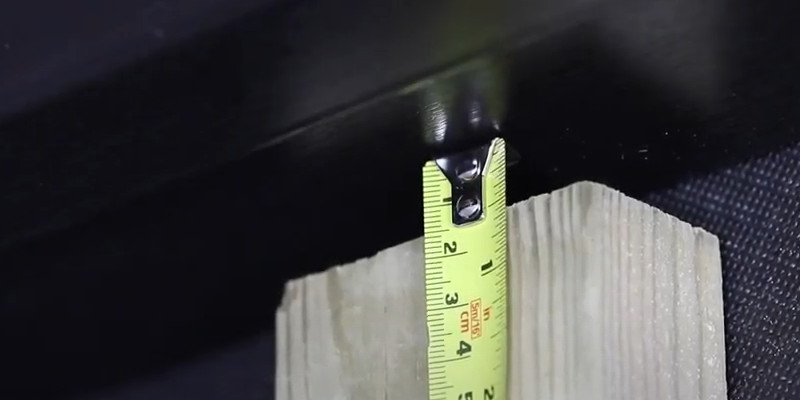
Gap left underside of the soffit
A minimum gap of 150mm is required from ground level to the bottom of the battens.
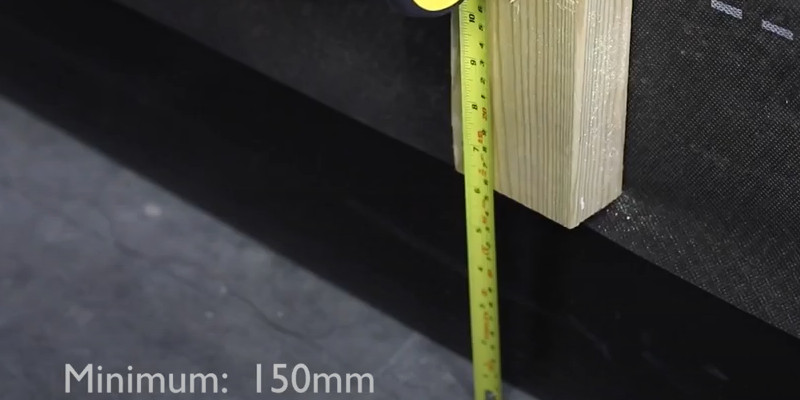
150mm gap required from ground level to the bottom of the battens.
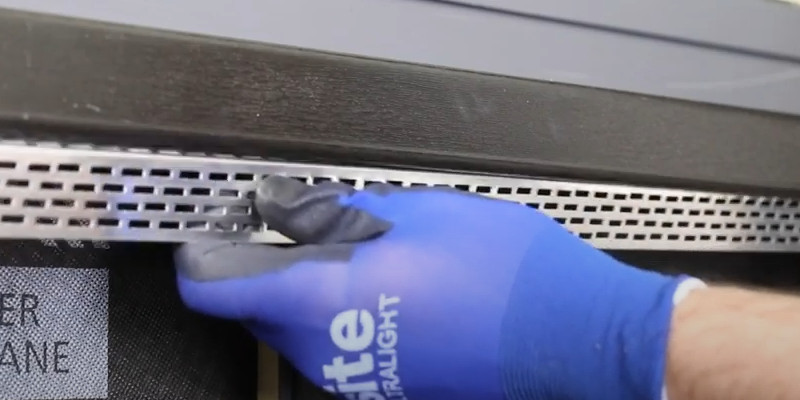
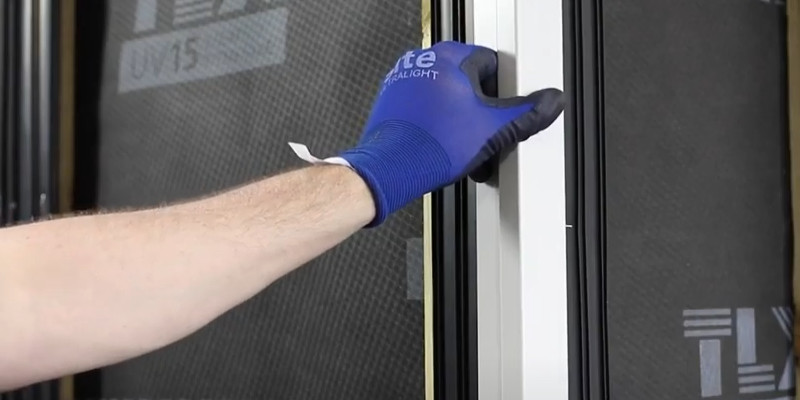
Fix the waterproof strip onto every vertical batten. This is to ensure the batten is protected from moisture ingress.
Waterproof strip
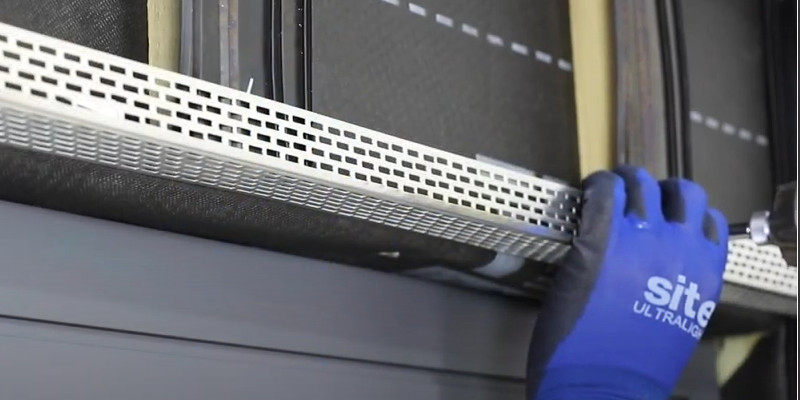
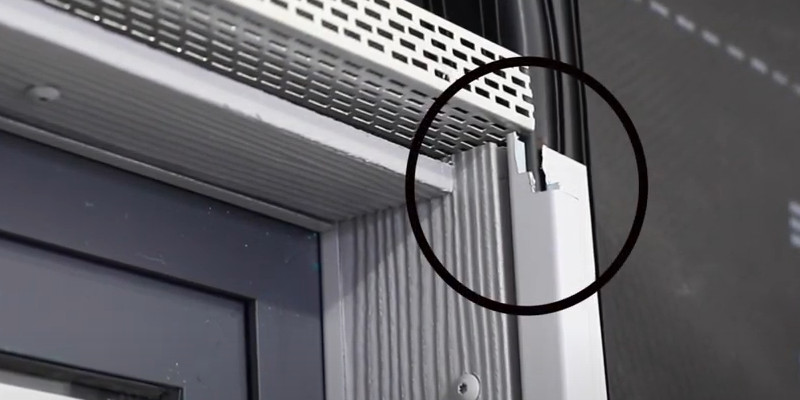
Perforated closures allow ventilation through continuous air flow. This must be fitted at the bottom of the installation, below window sills, above window heads and at the top of the installation along the soffit line.
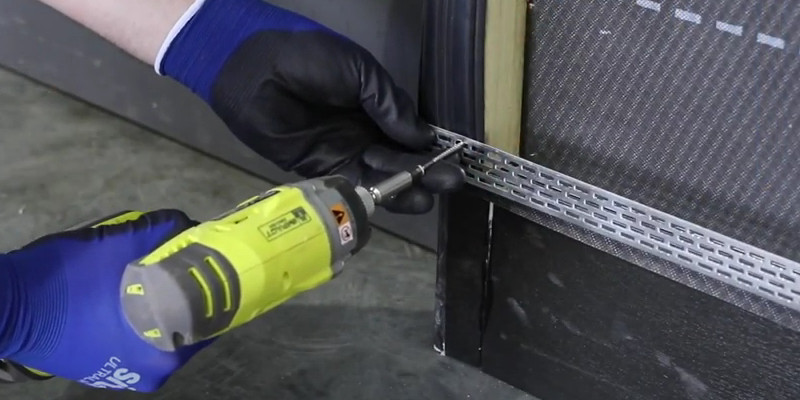
Cedral perforated closure
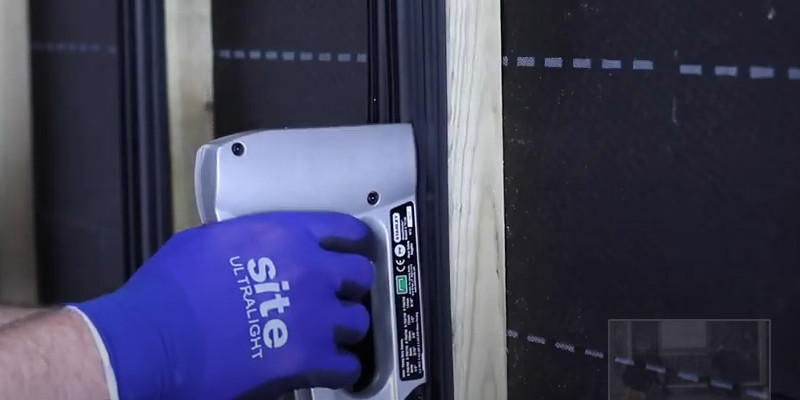
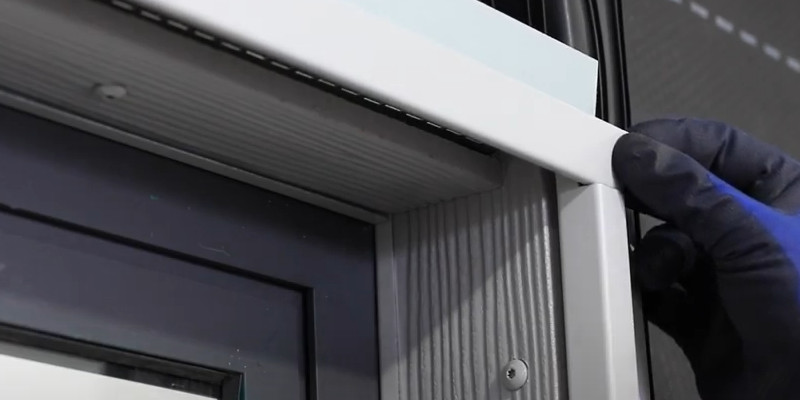
Position level and then screw the vertical profiles into place. Ensure the Cedral click starter profile is leveled and then screw into place.
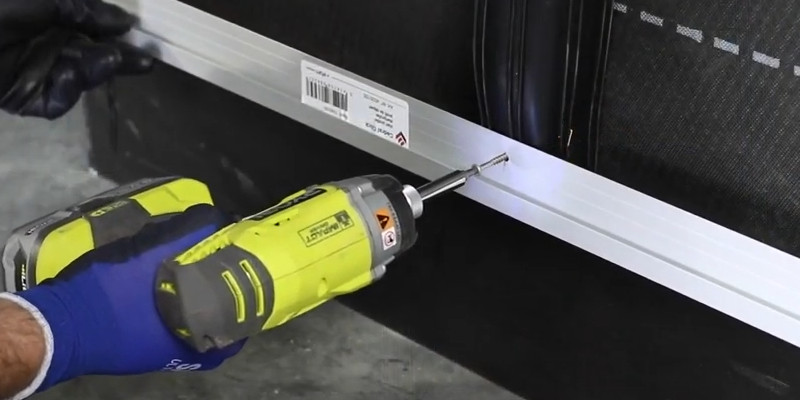
Cedral click profile installation
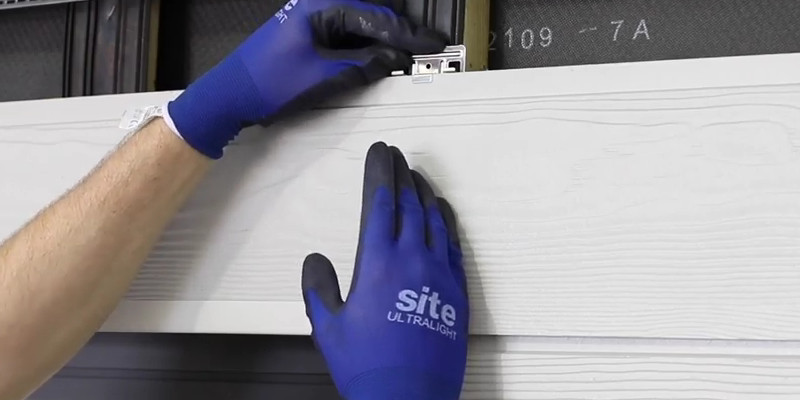
First Cedral click plank is fitted onto the Cedral click starter profile and fixed with clips on every supporting batten.
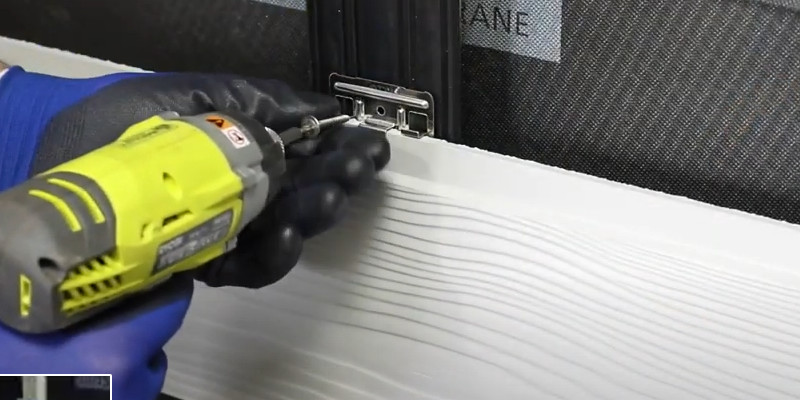
Cedral plank fitted
Check if this is level and both sides of the clip are slaughtered fully onto the top of the panel before screwing into place for the Cedral click screw.
2. Finishing under a window sill
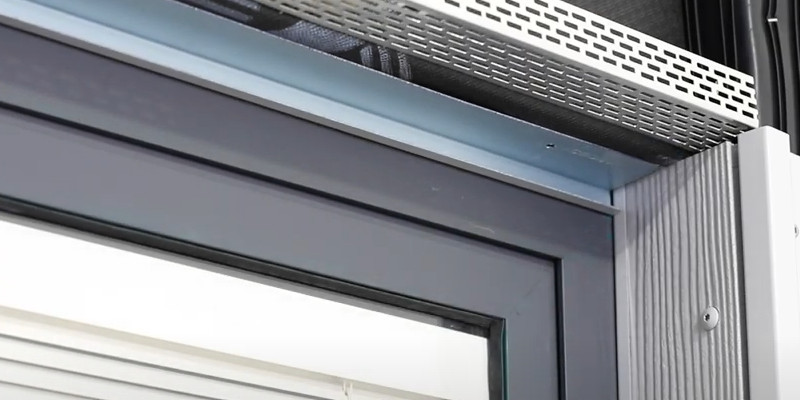
There must be a minimum gap of 10mm between the top of the batten and underside of the window sill.
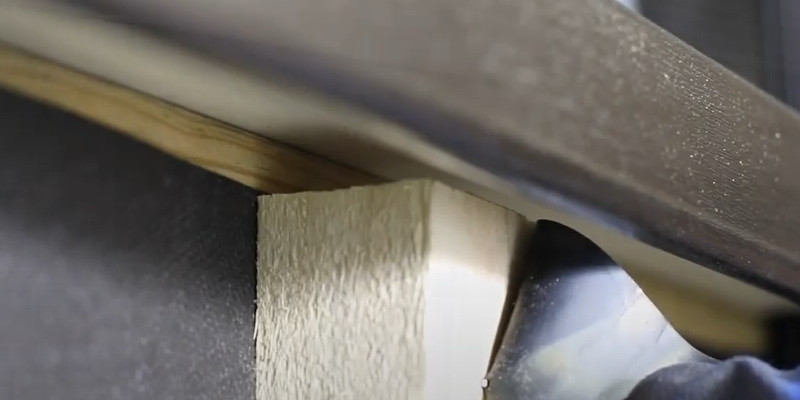
10mm gap above batten
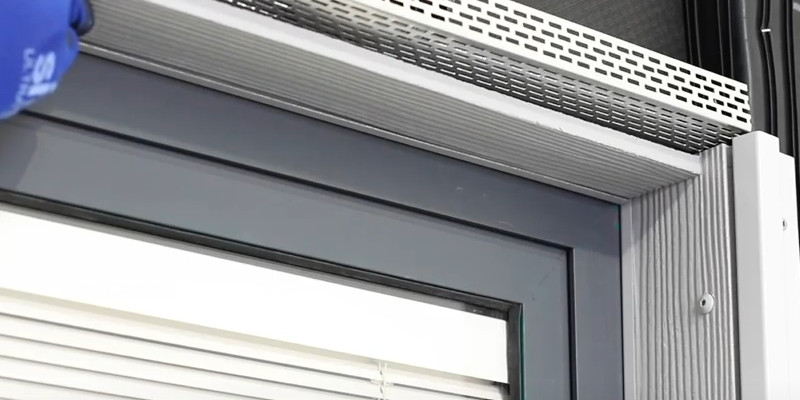
Fit the perforated closure on the top of the battens.
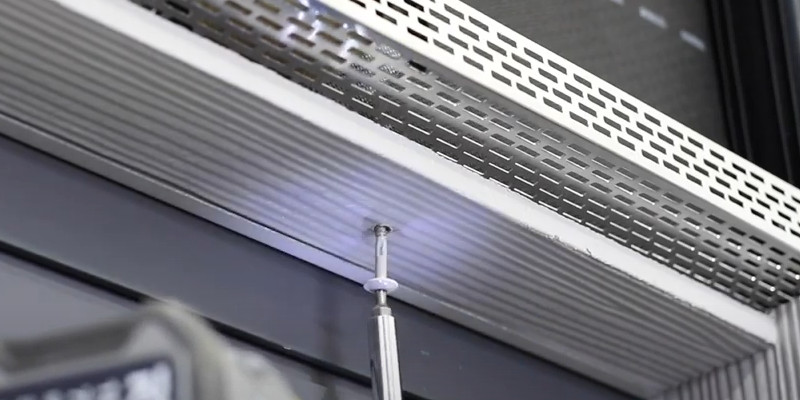
If required trim the Cedral click plank ensuring it fits correctly underneath the window sill. Fit the Cedral click plank into the clips and screw into place through the face of the plank using Cedral color coded screws.
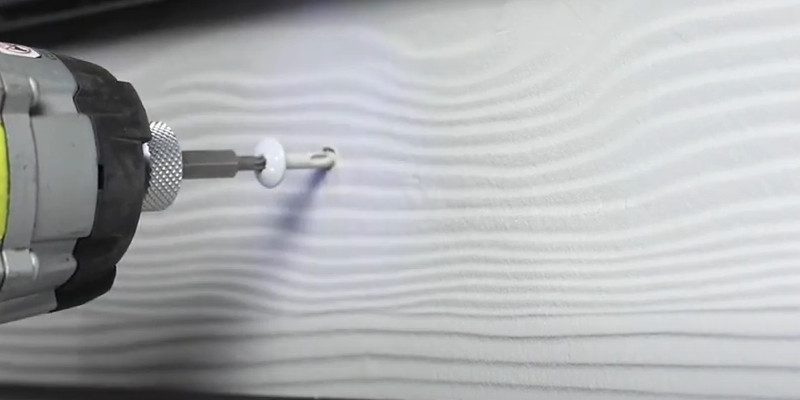
Cedral color coded screws
Ensure there is a minimum 10mm free air gap between window sill and the top of the Cedral click plank.
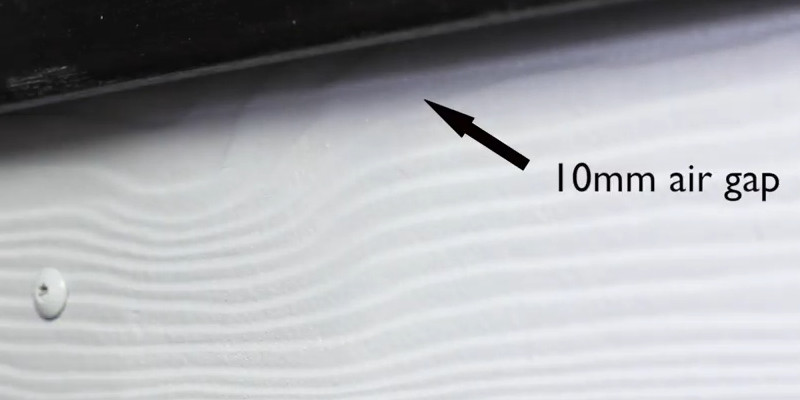
10mm air gap
The window sill must overhang the front edge of the Cedral click plank by min of 40mm.
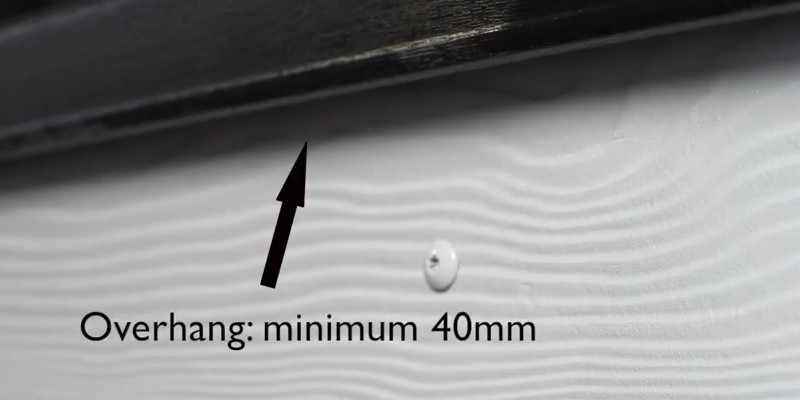
40mm overhang
3. Finishing a window reveal
Battens used for windows reveals must be a minimum size of 38mm by 100mm and have the front and side faces covered with a waterproof strip.
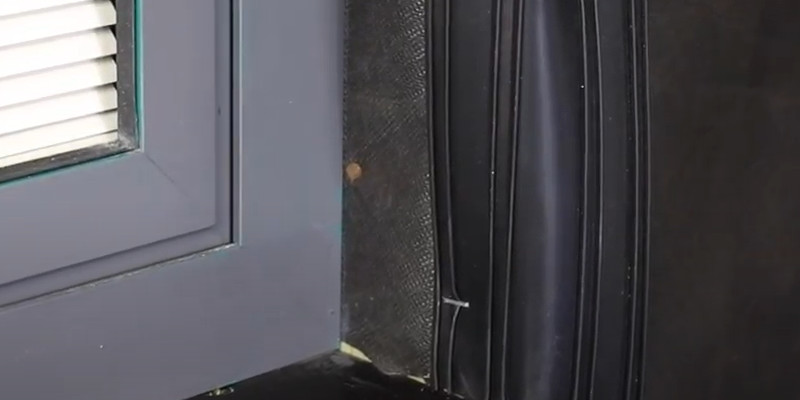
Waterproof strip
Cedral click external corner has to be cut to size, leveled and placed into position before fixing at the top and bottom on both sides.
Cedral external profile installation
The connection profile must be cut to size and fixed into the rear of the window reveal. To finish the reveal Cedral plank is cut to size and fitted vertically.
Cedral connection profile on window reveal
Push back to the reveal and fix to a place with a color coded screws.
Window reveal finish
4. Finishing a window head
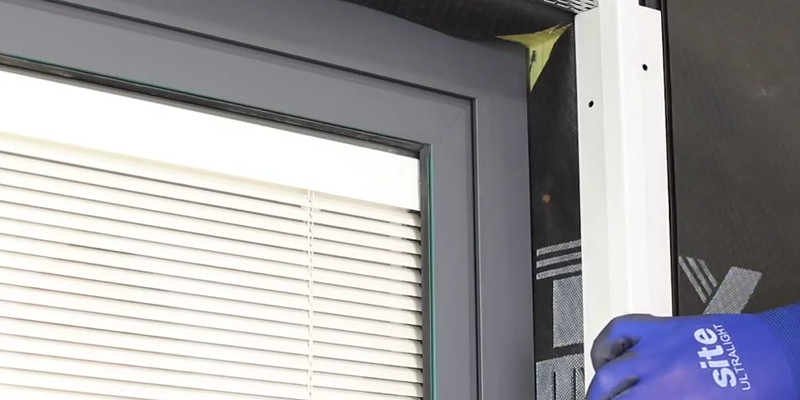
Perforated closure must be fixed to the underside of all vertical battens above the window head.
Perforated closure fixed to head of the window
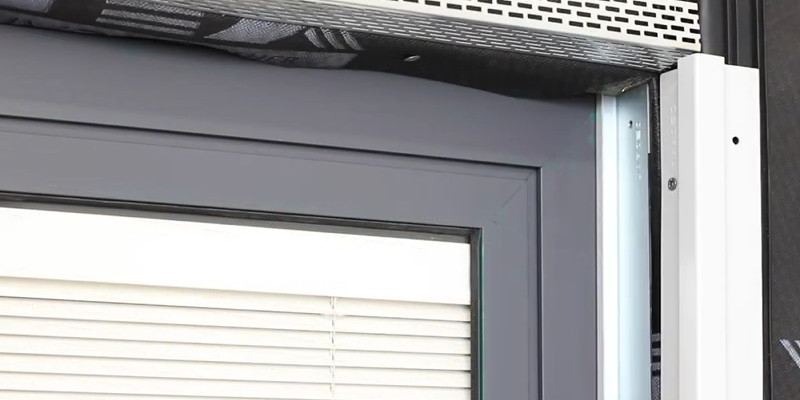
A connection profile must be cut and fixed into the rear of window head reveal.
Cedral connection profile fitted on window head
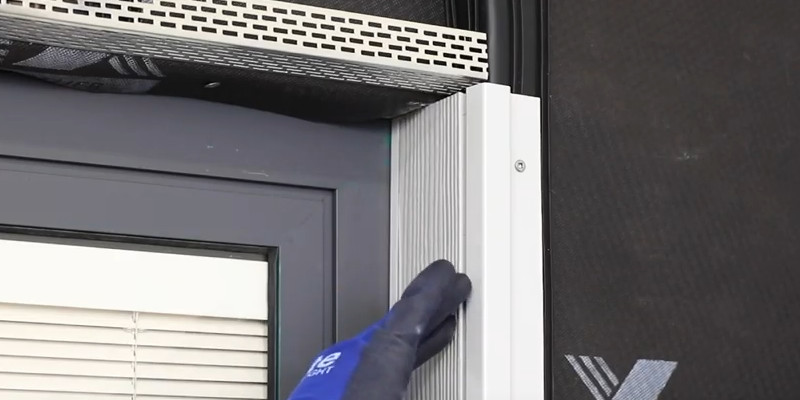
Cut Cedral plank to size ensuring 20mm of perforated closure is a visible for ventilation purposes.
Cedral plank fitted on window head
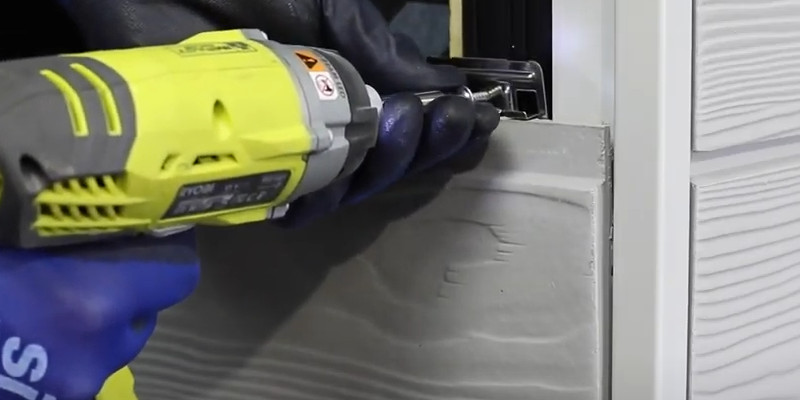
Slot the cut edge into the connection and fix into place with a color-coded Cedral screws.
Fixing Cedral color coded screws
The vertical Cedral click external profile has to be cut to accept the window link to profile at required height.
Cedral external profile cut to fit lintel profile
The external corner profiles were also support the Cedral panel but will be placed above the window. The window lintel profile is then positioned, leveled and fixed using Cedral click screws.
Fitting Cedral lintel profile
Fit the next plank into the lintel profile and plank into the lintel profile and continue fitting panels using Cedral clips and screws.
Fitting Cedral planks above lintel profile
5. Joining Cedral Click planks
When Cedral Click is manufactured all edges are mechanically cooked and factory painted.
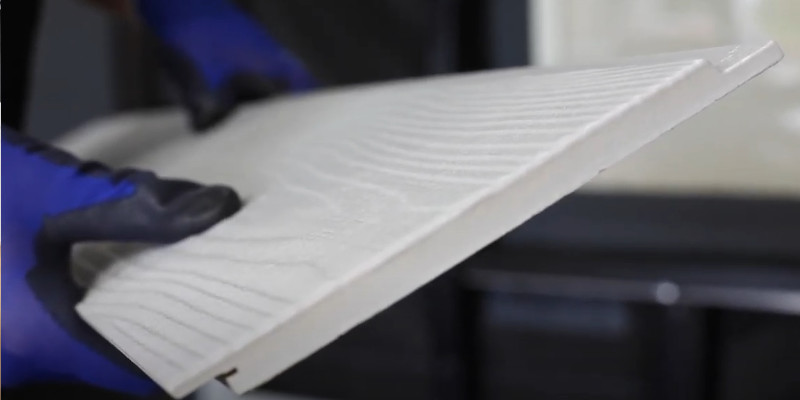
Cedral mechanically cooked and factory painted
Where possible use the finished edges where joins between planks are required with the most aesthetically pleasing finish. If this is not possible, Cedral Touch Up paint is used to finish the cooked edges of planks.
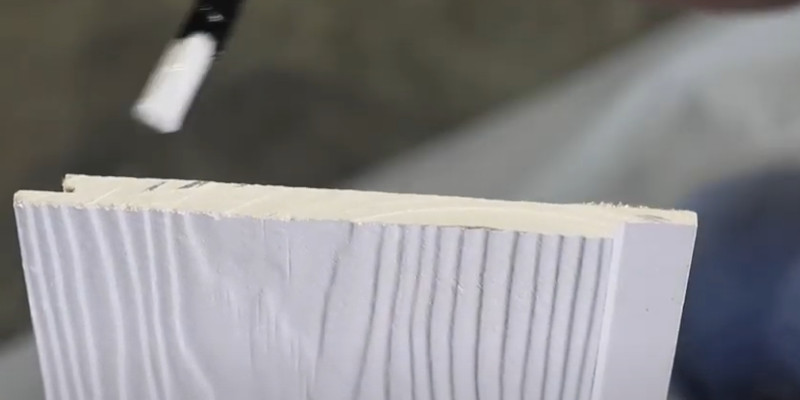
Apllaying Cedral Touch Up paint
Thoroughly mix the touch up paint before application. Touch up paint should be applied sparingly to cut edges with the small brush ensuring not to drip or splash paint onto the face of the planks. Wipe away any sections of access paint from the face of the Cedral click plank with a clean dry cloth.
Two planks can be joined on one single click clip loosely but the two planks together without using force.
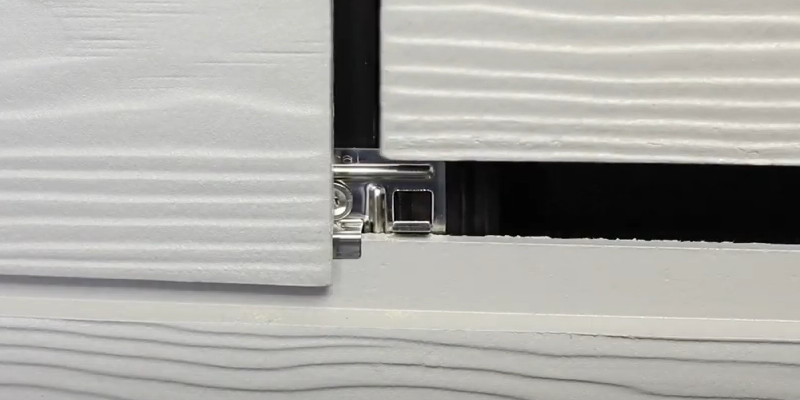
Jointing two Cedral planks
Place a single clip onto the top of two planks and screw it into place at both points.
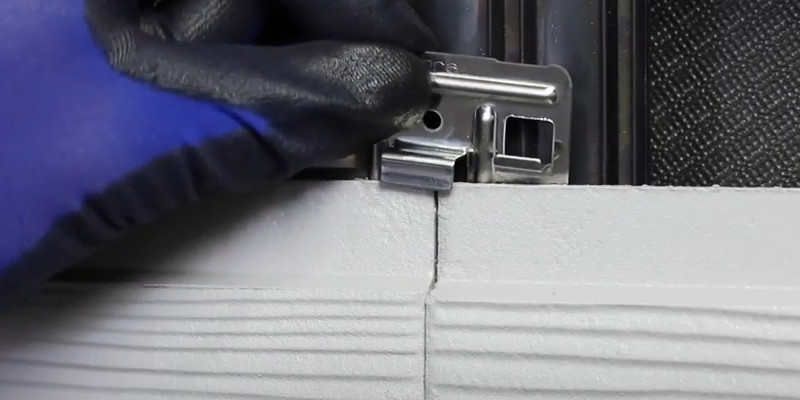
Fitting Cedral clip
6. Fitting around an exterior corner
The battens at an external corner must consist of 38mm by 75mm batten and 38mm by 100mm.
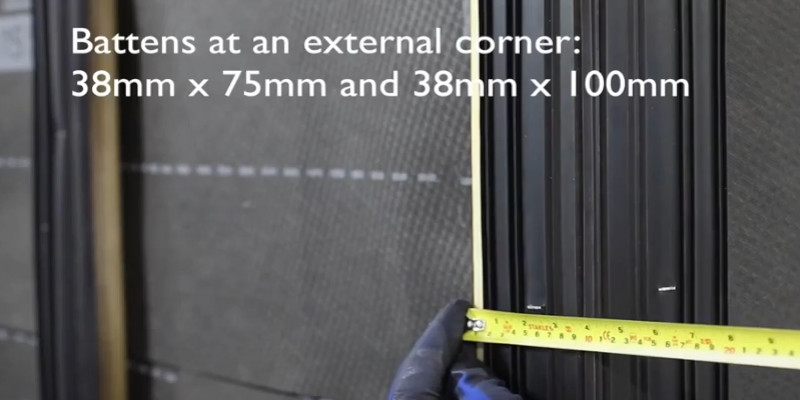
Battens dimensions for external corner
Both battens must be covered with waterproof strip along the full length of the front faces. Cedral click external corner profile is then be positioned, labeled and fixed on both battens.
Fitting Cedral external corner
When Cedral click planks are fixed ensure 3mm gap is left between the edge of the plank and the profile to allow thermal expansion within structure.
3mm gap needed for thermal expansion
Continue to fix the planks around the corner ensuring the levels between planks are consistent.
Fixing Cedral boards around external profile
Related articles:
Cedral Cladding and Frequently Asked Questions
Cedral cladding. Lap or Click?
Fibre cement cladding technology
How to install Cedral Lap Cladding
How to clean fibre cement cladding?
Weatherboard Touch Up Paint for Cedral
How much is Cedral cladding per square Metre?
Cedral Weatherboard. Timeless façade board?
Bibliography:
1.youtube.com “Cedral Click Chapter 1 - Getting Started” June 16, 2018, accesed April 13, 2022
https://www.youtube.com/watch?v=mjtzOLbbdgI
2.youtube.com “Cedral Click Chapter 2 - Finishing under a window sill” February 22, 2018, accesed April 13, 2022
https://www.youtube.com/watch?v=mEdHIzm1Dqs
3.youtube.com “Cedral Click Chapter 3 - Finishing a window reveal” February 22, 2018, accesed April 13, 2022
https://www.youtube.com/watch?v=JVahX_s0zcw
4.youtube.com “Cedral Click Chapter 4 - Finishing a window head” February 22, 2018, accesed April 13, 2022
https://www.youtube.com/watch?v=CgYnka06PME
5.youtube.com “Cedral Click Chapter 5 - Joining Cedral Click planks” February 22, 2018, accesed April 13, 2022
https://www.youtube.com/watch?v=O5aZfcVwO9U
6.youtube.com “Cedral Click Chapter 6 - Fitting around an Exterior Corner” March 16, 2018, accesed April 13, 2022
https://www.youtube.com/watch?v=hzKk5nvVH7g
*All the information provided in the content published on Insulationgo blog is for informational and educational purposes only. Insulationgo LTD makes every effort to ensure the accuracy and timeliness of the content, but we do not assume any responsibility for any errors or omissions.
The information presented on this blog should not be considered as professional advice or a substitute for consulting relevant experts. Before making any purchase decisions or taking action based on the information presented here, it is strongly recommended to contact the product manufacturer directly to verify the details and ensure its suitability for your specific needs.
By using this blog, you acknowledge and agree that Insulationgo LTD shall not be held liable for any damages, losses, or inconveniences arising from the use or reliance on the information provided herein. This limitation of liability applies to all users of the blog, including but not limited to visitors, readers, and subscribers.
