

Related
More from this brand
- 17mm Monodeck 17T Acoustic Overlay Floor Insulation Board
- Enables a timber floor to meet the sound transmission regulations
- Provides approx. 48dB airborne and impact noise reduction
- Suitable for conversions, refurbishments or new build projects
- Meet the sound transmission regulations of Approved Document E 2003
In Stock
- Brand: Isomass
- Model: 17mm Monodeck 17T
- Weight: 5.11kg
- Dimensions: 1,200mm x 600mm x 17mm
- SKU: 17mm Monodeck 17T
- Product code: P1-3555
- MPN: 17mm Monodeck 17T
Options available
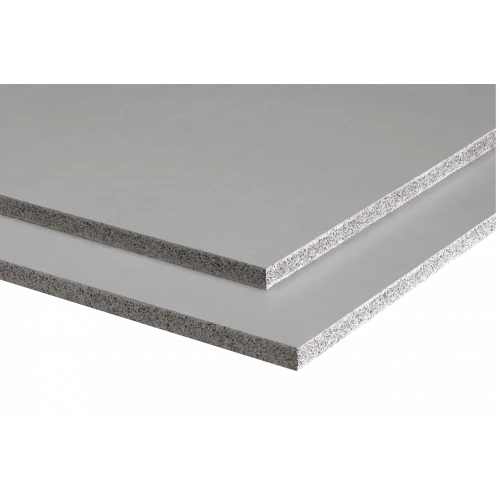
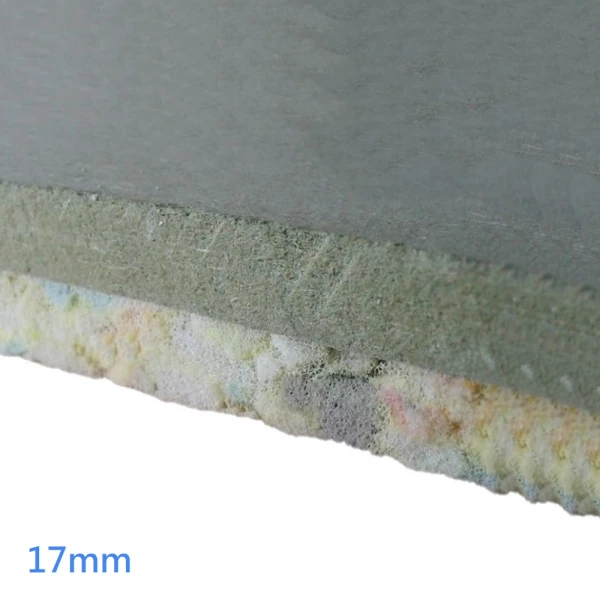
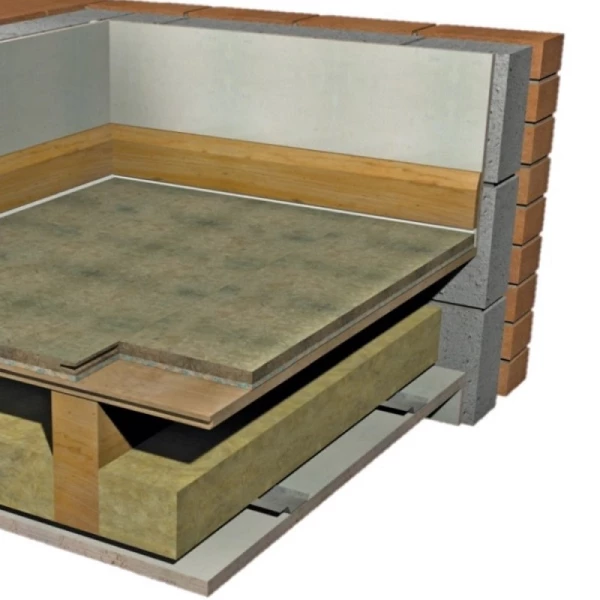
Monodeck 17T is an acoustic overlay floor insulation system, a 17mm thick board used directly to floorboards to reduce transmission through timber floors in situations where finished floor height is critical.
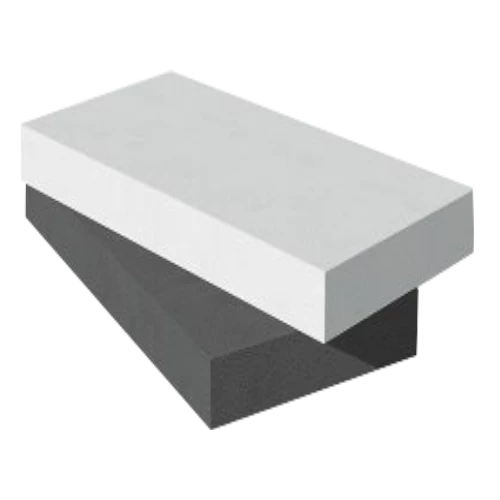
Isomass Monodeck 17T floor board is a 17mm thick acoustic insulation consisting of a layer of 8mm reconstituted ACF (Acoustic Chip Foam) bonded to 9mm moisture resistant medium density fibreboard.
When installed as part of a complete sound reduction system, it enables a timber floor to meet the sound transmission regulations of Approved Document E 2003 and subsequent amendments.
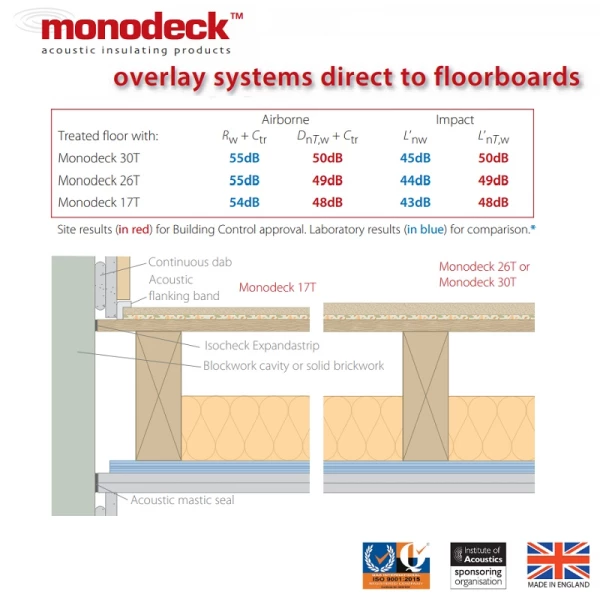
Isomass Monodeck 17T System when tested for Building Control approval provides excellent results of approx. 48dB airborne and impact noise reduction when correctly installed.
Monodeck 17T acoustic overlay board can be used over existing floorboards for conversions, refurbishments or new build projects with a new resilient bar ceiling.
For full performance Mondodeck acoustic overlay floor system adhesive and flanking band should be used to reduce impact vibration leaking via structural walls and assists in reducing airborne sound paths.
The cutting of boards, either by hand or machine, will produce dust that may be an irritant if inhaled, please use dust masks when carrying out all cutting operations.
The finished acoustic floor system should be protected with an appropriate layer immediately after being installed to prevent damage by any following tradesmen.
Installation of Monodeck should not commence until roof, window glazing and wet trades are completed and the structure is watertight.
Leave overnight for adhesive to cure before trafficking the newly installed system.
Specification:
Thickness: 17mm
Width: 600mm
Length: 1200mm
Size: 17mm x 600mm x 1200mm
Board Coverage: 0.72m2
Profile: Tongue & Groove
Resilient layer thickness: 8mm
Resilient layer fire test: Tested to BS 5852-2:1982
Weight: 5.11kg per board
Resilient layer: Reconstituted ACF (Acoustic Chip Foam)
Airbone reduction: 48dB
Imapct reduction: 48dB
Monodeck 17T Acoustic Floor System Features:
· Easy to handle.
· Overlay platform system.
· Used directly to floorboards.
· Used to reduce transmission through timber floors.
· Complete acoustic floor system with adhesive and flanking band.
· Enables a timber floor to meet the sound transmission regulations.
· Provides approx. 48dB airborne and impact noise reduction.
· Suitable for conversions, refurbishments or new build projects.
· Reduce impact vibration leaking.
· Reducing airborne sound paths.
Monodeck 17T Floor Insulation System Installation Guidelines:
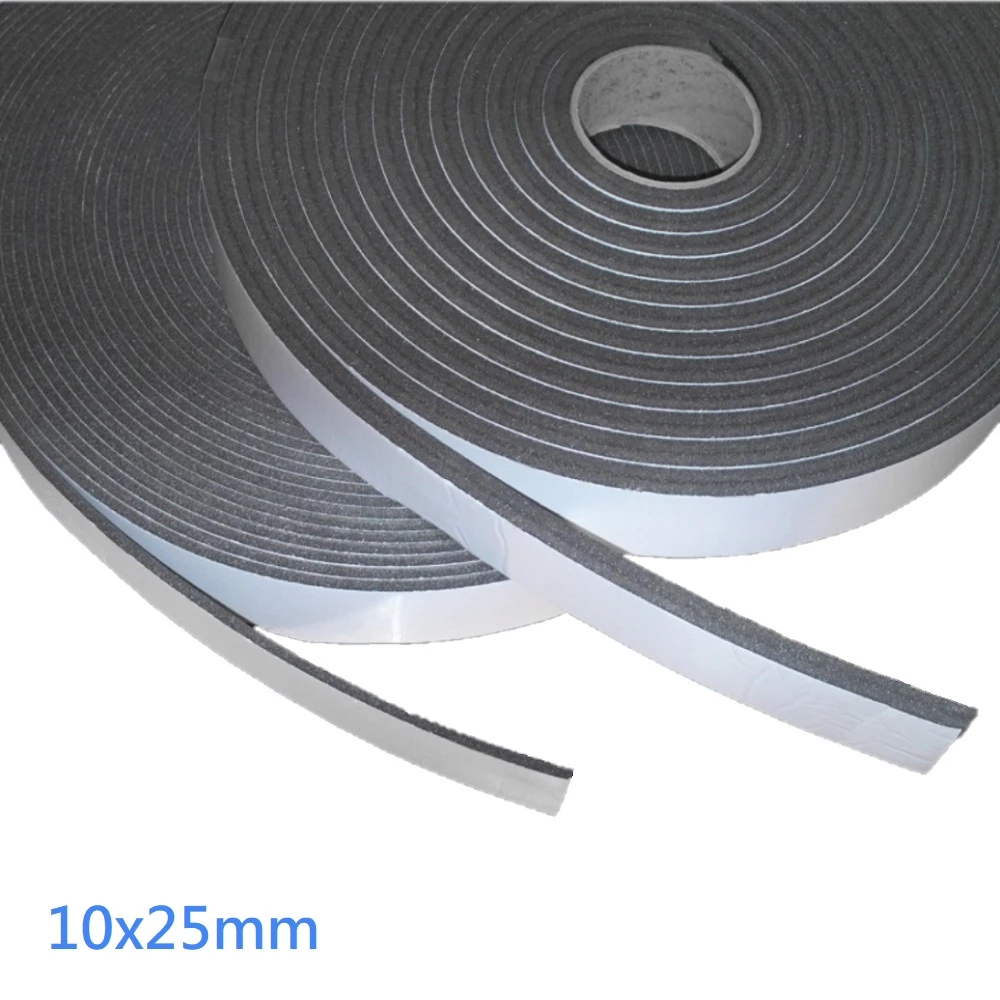
· Apply Isocheck Acoustic Angled Flanking Band on the edges of the Isocheck boards just before they are pushed against the perimeter walls to isolate the board from the wall.
· Board fitting should begin at the furthest point from the entrance and marked out so as not to finish with any panels less than 200mm wide.
· The decking must be laid in broken bond pattern, with all joints glued and staggered - No Mechanical fixings should be used.
· Isocheck adhesive is applied to both the top of the tongue and the bottom of the groove on each side of each joint.
· The boards are then pushed tightly together.
· Surplus adhesive should be wiped away from the surface with a damp cloth.
· Before commencing work please ensure that all recessed down-lights or other invasive fittings have been correctly treated prior to closing off the subfloor from above with the Monodeck system.
· If not confirmed of a solid construction all structural walls should be sealed both top and bottom prior to floor laying. e.g.: lath & plaster wall linings, dot & dab systems, 'hollow' battened skirting's, etc.
· The sub floor should ideally be min. 18mm chipboard, OSB, decking ply or original floorboards with a continuous layer of 100mm (45kg/m3) mineral wool insulation between the joists.
· All nails and screws must be driven flush and securely fixed.
· The sub-floor should be level, dry and swept clean to allow the Monodeck system to be laid flat.
· All service penetrations should be isolated from and sealed to the sub-floor.
· Installation of Monodeck should not commence until roof, window glazing and wet trades are completed and the structure is watertight.
· Leave overnight for adhesive to cure before trafficking the newly installed system.
· Door openings should have linings fitted prior to the installation of the acoustic floor.
· The Monodeck boards should be carefully detailed to ensure a good fit.
· Although not ideal, architraves and stops can be fixed after floor installation, leaving a 2/3mm gap from the surface of the floor.
· To prevent flanking transmission all skirting must be isolated from the floor surface.
· Before incorporation, place Isocheck Flanking Strip around the edge of the Monodeck boards before pushing into position.
· Stud partitioning should be built from the sub floor wherever possible.
· If it is your intention to build off the top of Monodeck 17T, 26T and 30T systems, additional advice should be sought.
· It is good practice to isolate all partitions built from the sub-floor with Monodeck Flanking Strip as this will improve the performance of the walls as well as the floors.
· Isocheck Flanking Strips provide isolation of the flooring system from all vertical structures and penetrations.
· The Flanking Strip is trapped to the wall and returned down over the monodeck board as the perimeter boards are placed.
· The skirting board is then fixed to the wall securing the flanking strip between the skirting board and the Monodeck.
· After the skirting board is installed, simply trim the Flanking Strip flush with a sharp knife.
· When laying the monodeck in a bathroom, the bath should be supported from the sub-floor on isolation pads, and the floating floor terminate at the legs of the bath as close as possible.
· The bath panel can then be installed making a neat, flush finish.
· Plywood the same height as the Monodeck should be laid under the bath, toilet and wash basin area and the joints filled with acoustic sealant where necessary.
· All new ceiling boards should be installed first, especially before any drylining of walls (such as dot & dab) to prevent potential flanking transmission.
· Ceilings should be boarded with a minimum mass of 20kg/m², and must be fixed to resilient bars or suspended from a metal frame system in accordance with manufacturers recommendations.
· Appliances and sanitary ware, with rigid plumbing connections that penetrate the system, should be isolated from the sub-floor and floating floor.
· Should be isolated by cutting a hole up to 10mm larger than the service diameter and filling the gap with a flexible sealant.
· Ideally, kitchen worktops should be isolated from the wall with a Isocheck flanking isolation strip and trimmed flush with surface before tiling commences.
· When laying Monodeck in a kitchen we suggest that for best performance the kitchen units are installed on the subfloor on pads, so that the monodeck can terminate at the legs of the units.
· The plinth can then be installed to the kitchen unit legs, making a neat, flush finish.
· Lay the floor in areas where appliances will sit, allowing for adequate height below the work surfaces.
· If installing the units on the floating floor additional advice should be sought to reduce the potential for unwanted impact flanking noise.
*Further information may be found in our Downloads section.
Fairly easy access to all PDF files.
Datasheet ǀ Declaration of Performance - DoP ǀ BBA Certificate ǀ Installation Guide ǀ Certificates ǀ Brochure ǀ SPEC Sheet
*Special Product - Non returnable cancelable.
| specification | |
| Handling Characteristic | Protect hands from splinters during manual handling |
| Board covarage | 0.72 m2 |
| Colour | Light grey |
| Length | 1200mm |
| Material | Acoustic Chip Foam and Moisture Resistant Fibreboard |
| Profile | Tongue & Groove |
| Size | 17mm x 600mm x 1200mm |
| Thickness | 17mm |
| Width | 600mm |
| Fire Classification | Tested to BS 5852-2:1982 |
| Building Regulations | Compatible |
| Coverage | 0.72m2 |
| Finish | 9mm moisture resistant medium density fibreboard |
| Shipping method | Articulated Vehicle ǀ Courier |
| Grade | Acoustic Floor Overlay System |
| Sound insulation reduction | 48dB (Airbone and Impact) |
| Applications | Floor, Bathroom, Ceiling, Kitchen, Stud Partitioning |
| Type | Acoustic Overlay Floor Insulation Board |
| Fixing method | Adhesive and Flanking Band |
| ETA Notification | Yes |
| Features | Reduce Sound Transmission |
| Manufacturer | Isomass® |
We deliver insulation materials to Mainland UK only. Deliveries to Highlands, Northern Ireland, Isle of Wight etc.. might be possible at additional cost.
We offer free delivery on most of the orders above £300 (excluding VAT) (except special products - shipping cost via courier - products marked ''Request A Quote'')
Delivery of some insulation materials might be extended due to the current situation (Covid-19, stock shortages, allocations).
If you need materials quickly please contact us - we will do our best to help you source materials needed.
We do not deliver on weekends and bank holidays. Sometimes we can deliver on Saturdays - please check with us before placing the order.
If you need any further information please contact us tel. 02081910776
We can help to calculate price per m2 or linear meter (one meter in length) cost, please just contact us via phone 02081910776, email or live chat. Alternatively, you can work it out yourself quickly and easily: to get cost per meter square please divide price shown in orange area by ''Required area (m2)'' Example price of £28.80 divided by board coverage 2.88m2 = cost of £10.00 per m2.
INSTALLERS
No matter whether you choose a local installer or a national company, there’s a few tips to help you find the right installer for your home insulation improvements, such as asking for recommendations and making sure that they’re part of a certification scheme. This makes sure that they have the right skills and standards of workmanship to carry out the installation, and you can be sure that they know exactly what they are doing.
4 TIPS FOR CHOOSING THE BEST INSULATION INSTALLER
1. Thermal inspection picture in portfolio
It’s worth seeing a installer’s previous work. There’s no harm asking if you can see any properties nearby that they’ve installed insulation in. Best way would be to see Infrared Thermal Imaging Inspections. Thermal cameras spot small, but key changes in temperature in different areas of a house, identifying problematic areas that the human eye never could and some that a visual inspection could only hypothesize.
2. Reviews
Along with checking recommendations and previous work, finding reviews online can often be a great way to find out if they provide a good service or not. However, it’s best not to solely rely on reviews you may find or review websites, as there’s no controlling who writes them.
3. Compare prices
Comparing prices will also ensure companies can’t take advantage of you and give you a fair price.
4. Word of Mouth
The best way to find a great insulation installer is through recommendations. Make sure you ask friends and family. They will most likely give you their honest opinion and can tell you from first hand experience.
Whether you require a wall, cladding, external wall, loft or floor insulation fitted, you can find and hire your local insulation installers from popular UK web pages. A simple internet search will return thousands of potential installers near your area.
https://www.nia-uk.org/find-an-installer/
https://www.ratedpeople.com/local-thermal-insulation
STOCKIST
We are the stockist of construction materials and related products for both trade and DIY from most recognizable brands in the UK like Cordek, RCM, Promat, Rockwool, Isover, Celotex, Xtratherm, Ursa, Low-E, Cedral, Kingspan, Dufaylite, British Gypsum, K-rend, Ecotherm, Iko enertherm, Kay-Metzeler, Terrawool to allow you to complete your insulation job on time at competitive prices and the highest standards.


