PLASTERBOARD / DRYWALL
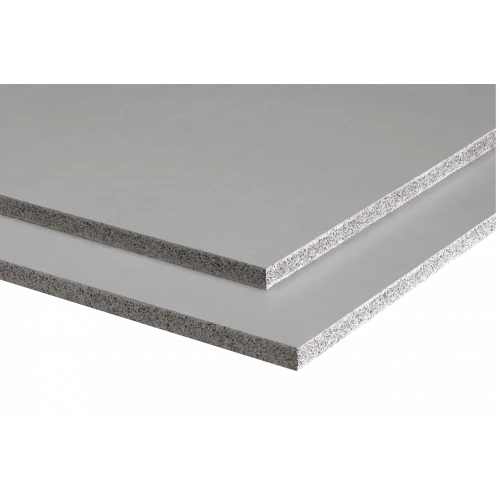
Plasterboard also known as gypsum board, drywall, wallboard or wall panel is a very popular, quick alternative to traditional lath and plaster that can be used to make interior walls and ceilings. In fact, drywall or plasterboard are the same product just described in various terms, often depending on geographical location. It comes with an ivory paper coating, ready for direct finish and can be mounted to anything from cement block to metal or wood studs. The primary use of plasterboard is to build partitions, wall linings or ceilings in any building, ranging from hospitals and schools to shops and domestic properties. One of the advantages of using dry lining or plasterboard is that you can hide unsightly wires and utility lines and apply paint directly on to the surface without having to plaster or wait for the skim coat to dry. Often the cost of re-rendering/plastering versus a plasterboard dot and dab covering/plaster is cheaper for the plaster boarding. It is also a much quicker technique as drying out time is much faster. Good quality plasterboard should be able to hold around 18kg in pull out load. Generally speaking plasterboard is inexpensive and easy to work with. They are made by well known manufactures such as British Gypsum, Knauf, Siniat and Fermacell. Its price often depends on the supplier location near your project. As of 2022 the average cost of plasterboard is £10.53 per 8x4 size board which results in £3.66 per m2. You can expect to install plasterboard to a ceiling to be in a small room for 6-12 hours, medium room: 8-12 hours and a large room around 2-3 days. Plasterboards can be fixed to the wall with an adhesive or screwed to the steel or wooden frame.
DRYWALL PRODUCTION PROCESS
The gypsum is mixed with other additives like recycled paper pulp to create a slurry or paste. This slurry is spread in thin layers between paper or fiberglass backing. It’s then heated in a drying chamber to harden and dry. Most plasterboards are manufactured from sustainable resources and recyclable materials. Some are even manufactured out of 45 percent recycled materials and no chemicals are used.
DRYWALL SIZES | THICKNESSES
Popular plasterboard is available in specific thicknesses, which are contained within the UK building regulations. The boards are cut into a wide variety of sizes for different applications. Boards are usually 4 feet wide and 8 feet long, however they can vary in height. Taller boards can be used for quicker and more seamless installation on higher walls. There are 4 available heights of gypsum boards: 2.4m, 2.7m, 3m and 3.6m. The thickness of the drywall boards also varies. From as thin as 9.5mm or 12.5mm up to 15mm. The different thicknesses have different applications. The thinnest boards are best for curved walls or adding a layer to the existing drywall. If the drywall has a thickness of 9.5mm, the screws should be 32mm long. If you are looking to reduce sound or add insulation to an exterior wall, choosing thicker boards will provide the most benefit. Standard plasterboard thicknesses for ceilings are usually 9.5mm to 12.5mm, while walls can be 12.5mm to 15mm thick. Typical UK plasterboard dimensions are as follows: 2400 x 1200 x 12.5mm, 1800 x 900 x 12.5mm and 1220 x 900 x 12.5mm. Most UK ceilings are a standard height of 2.4m, so this shouldn’t be a problem for the majority of homes. Plasterboards can be awkward to handle and depending on their type and thickness weigh between 10kg and 45kg. The average time needed to install plasterboard manually is 1minute and 24sec (considered 3 workers).
DRYWALL APPLICATIONS
Dry walling can be used in a wide variety of applications such as garage and external ceilings, internal ceilings, framing requirements, construction of curves and arches, installation of cornices, building partitions wall linings, shop and office fit-outs, museums and galleries, receptions, airports, cable or pipe encasements, bathroom and kitchen, residential dwellings or commercial buildings. It can also be used to finish an entire basement or create barriers between rooms. It is good to be used to cover an outdated ceiling to create a smooth, seamless look.
PLASTERBOARD INSTALLATION METHODS
There are 2 main techniques of fixing plasterboard to the wall. First one is the standard timber or steel frame method. This technique requires plasterboard screws, plasterboard wall plugs or other fixings in order to be ready to finish. Other techniques called 'Dot and Dab' require nothing but plasterboard adhesive. There are no physical holes left after this installation. Sheet stays originally flat with the paper coating intact. This method uses either British Gypsum Adhesive or Knauf Plasterboard Adhesive. Generally speaking, Dot & Dab methods tend to be 3 times faster to install as it takes between three and six hours to set, which means you could carry out jointing or skimming the same day. In contrast, plaster takes two to three days to dry.
PLASTERBOARD FINISH
The gypsum based boards come either square edge (SE) finish for direct plaster application or tapered edge (TE) for taping jointing finish. Tapered edge section usually measures 40-50mm on each side of the plasterboard. Last method is used to prepare a wall for decoration and is an alternative to skim coating, where the entire surface of the plasterboard is covered with a thin layer of plaster. Both types of plasterboard require jointing tape to be used to bridge the gaps between sheets of plasterboard. The plasterboard scrim tape is embedded in a jointing compound to strengthen the plasterboard joints and prevent cracks appearing later. Several coats of the compound may be applied to create a flawless appearance. The wall is then sanded smooth. It may also be textured with various techniques depending on the intended finish. The surface is then ready to be primed, painted, or whatever finishing method is selected. To sum it all up, tapered edge plasterboard should only be used if you are planning to use jointing tapes. In order to calculate how much plasterboard adhesive you will need for the dot & dab method, it is important to note that dabs have to be 50mm and 75mm wide and around 250mm long and 10mm thick. For each board, three vertical rows are required where each dab should be 6 to 8 inches below the last one. For example, one 25kg bag of plasterboard adhesive will be enough for 1,5-2 boards. Dot and dab adhesive takes between three and six hours to set, which means you could carry out jointing or skimming the same day.
HOW TO CUT PLASTERBOARD?
To produce a professional finish, it’s essential that you make clean cuts in the plasterboard. So first thing first, lay the sheet flat on the floor and using the measurements you made previously, mark your dimensions on the board. Using a sharp knife against a straightedge or spirit level, cut through the top paper layer, but no deeper. You may find that you have to run the knife over the cut line two or three times to achieve this, so don’t try to force it on the first attempt. Lift the sheet off the floor and firmly push one side of the cut. You should find that it snaps cleanly along the line you cut. Use the knife again to cut through the paper layer on the other side. If necessary, use a plasterboard rasp to smooth any rough edges. Good practice is to cut larger pieces first and then use off-cuts to fill gaps.
DRYWALL CEILING INSTALLATION
Once your plasterboard is cut to size and ready to be fitted, stand on a ladder and lift your first piece of plasterboard up into the correct position on the ceiling. You may need someone on hand to pass you the plasterboard pieces while you’re standing on the ladder. Once you’re happy with the positioning of the plasterboard, you can knock some clout nails in to keep it in place. Around six clout nails will do for an 8‘ x 4’ plasterboard sheet. This step can prove helpful but isn't strictly necessary. Then, secure the board completely to the ceiling by adding 60mm drywall screws. Your screws should be drilled into the plasterboard and through to the ceiling. These should be positioned by the side of the clout nails that you knocked in earlier. Make sure your screws are being fed through to a joist or solid piece of timber frame to keep the plasterboard securely in place. Repeat this step across all of the ceiling, ensuring that you have someone on hand to help lift the plasterboard and hold the pieces in place as you secure them. Once your plasterboard pieces are up, check along all of them and add some extra screws in if you think it’s necessary. You may need a few extra screws for larger pieces of plasterboard just to make sure it’s completely tight against the ceiling. Once you’re happy with the number of screws in your plasterboard pieces and the whole ceiling is covered in plasterboard, the job is now complete.
DRYWALL WALL INSTALLATION
Measure the width of all four walls to work out how many vertically fixed boards you will need. Start by first measuring away from a window opening. Place an off-cut of plasterboard against the window reveal and measure the full width across. Allow for an extra 10mm of adhesive that will fix the window sections to the reveal. Repeat for the other side of the window reveal. Measure the width of the other three walls. Remember to allow for the thickness of the plasterboard (12.5mm) and adhesive (10mm) where ends butt up against each other. Using a laser spirit level or plumb bob, mark a vertical plumb line from floor to ceiling. Extend the marks onto the ceiling and floor. Draw a vertical chalk line down the marked plumb line. This line will act as your guide for the first board. Continue marking the board positions across your room. Mark a line across the ceiling which is 25mm from the wall (12.5mm for board thickness and another 12.5mm for adhesive). As you start sticking boards to the wall, this line will help you keep the face of the board level. Use a marker spray to mark the position of the adhesive dabs 400mm apart. Mix your plasterboard adhesive according to the manufacturer’s instructions. It dries fast, so only mix enough for one board. Using a builder’s float and pointing hawk, put dabs of adhesive on the walls. The dabs should roughly be 250mm x 50mm and no thicker than 25mm. There should be lines of dabs running from top to bottom of the wall, but don’t bridge the joins between sheets of plasterboard. Lift your plasterboard into place so that it’s in line with the chalk lines on the wall and ceiling. Use a heavy batten to tap the board flat against the wall. A long piece of 50x100mm timber will be perfect to do this. Check the board is vertical with a spirit level. If not, adjust the board’s position before the adhesive dries. Make sure the board fits tight against your ceiling. If it doesn’t, lift it up with a board lifter. Repeat for the other sheets of plasterboard. It is a good practice to install both the walls and ceiling of a room. It is always best to start with the ceiling to reduce the possibility of damage later on.
DRYWALL 'NEAR ME'
Wallboard range is very wide with variations of plasterboard sizes and plasterboard thicknesses to suit any construction project. Big merchants shops such as Wickes, B&Q, Selco or Travis Perkins offer low trade prices and amazing deals on bulk orders for gypsum board, plasterboard fixings and bonding for plasterboard.


